01 - DICOM to BIDS
1 DICOM-Files
- the raw files from the scanner are DICOM-Files
- directory
DICOMwith several subdirectories with numeric names containing DICOM images - but we generally need .nifti files for preprocessing and the subsequent analysis
- Example of a DICOM folder:
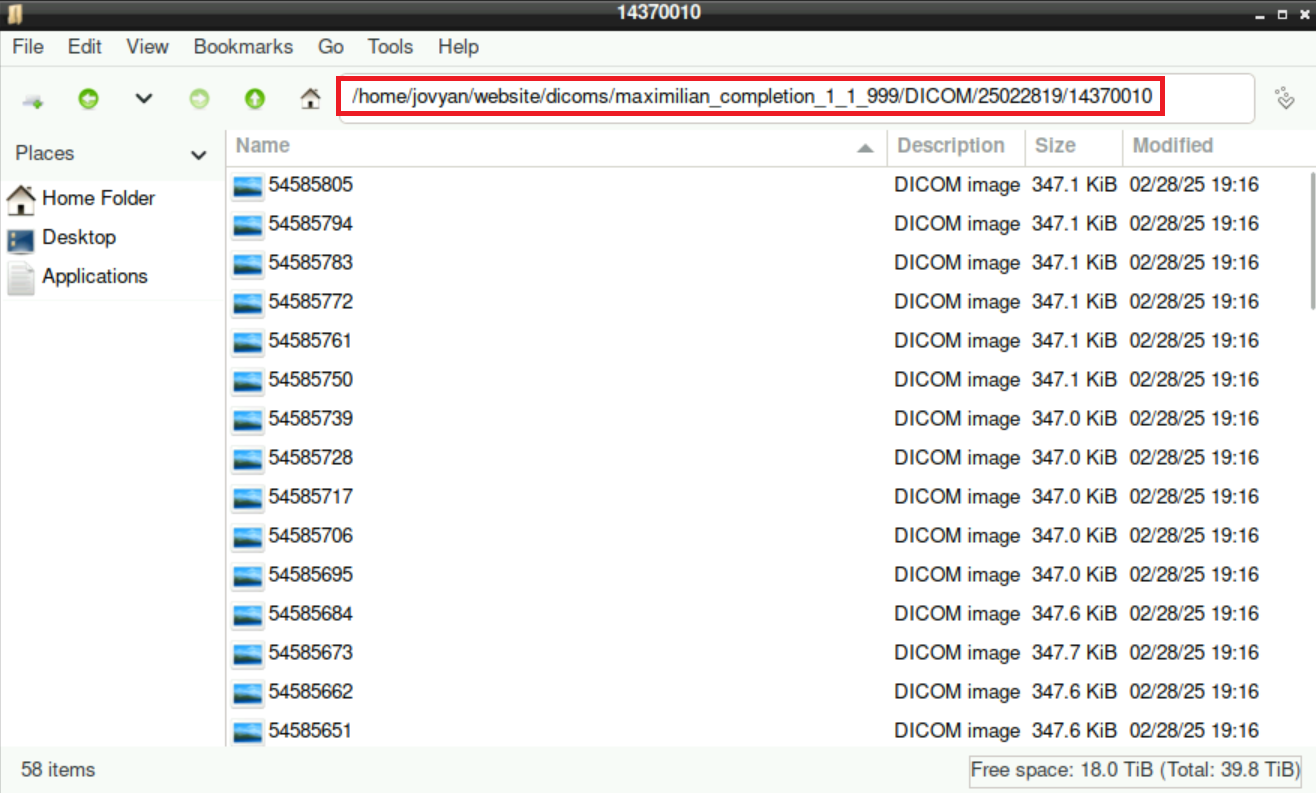
\(\qquad\to\) first step is to convert the DICOM- to nifti-files
2 From Dicom to nifti in BIDS format
Even though we often get the data from the scanner already in BIDS format, there can be cases when you have to do this conversion by yourself. For this, you can either use bidscoiner, or a script from Adam.
For both, you need access to Neurodesk!
2.1 About BIDS
Apart from a clear structure that is understandable (for other researchers as well) and standardized, the BIDS format offers further advantages. For example, various BIDS-Apps can perform different steps automatically (e.g. fmriprep), but they require the data to be BIDS-valid).
3 From Dicom to nifti in BIDS using bidscoiner
3.1 bidscoin
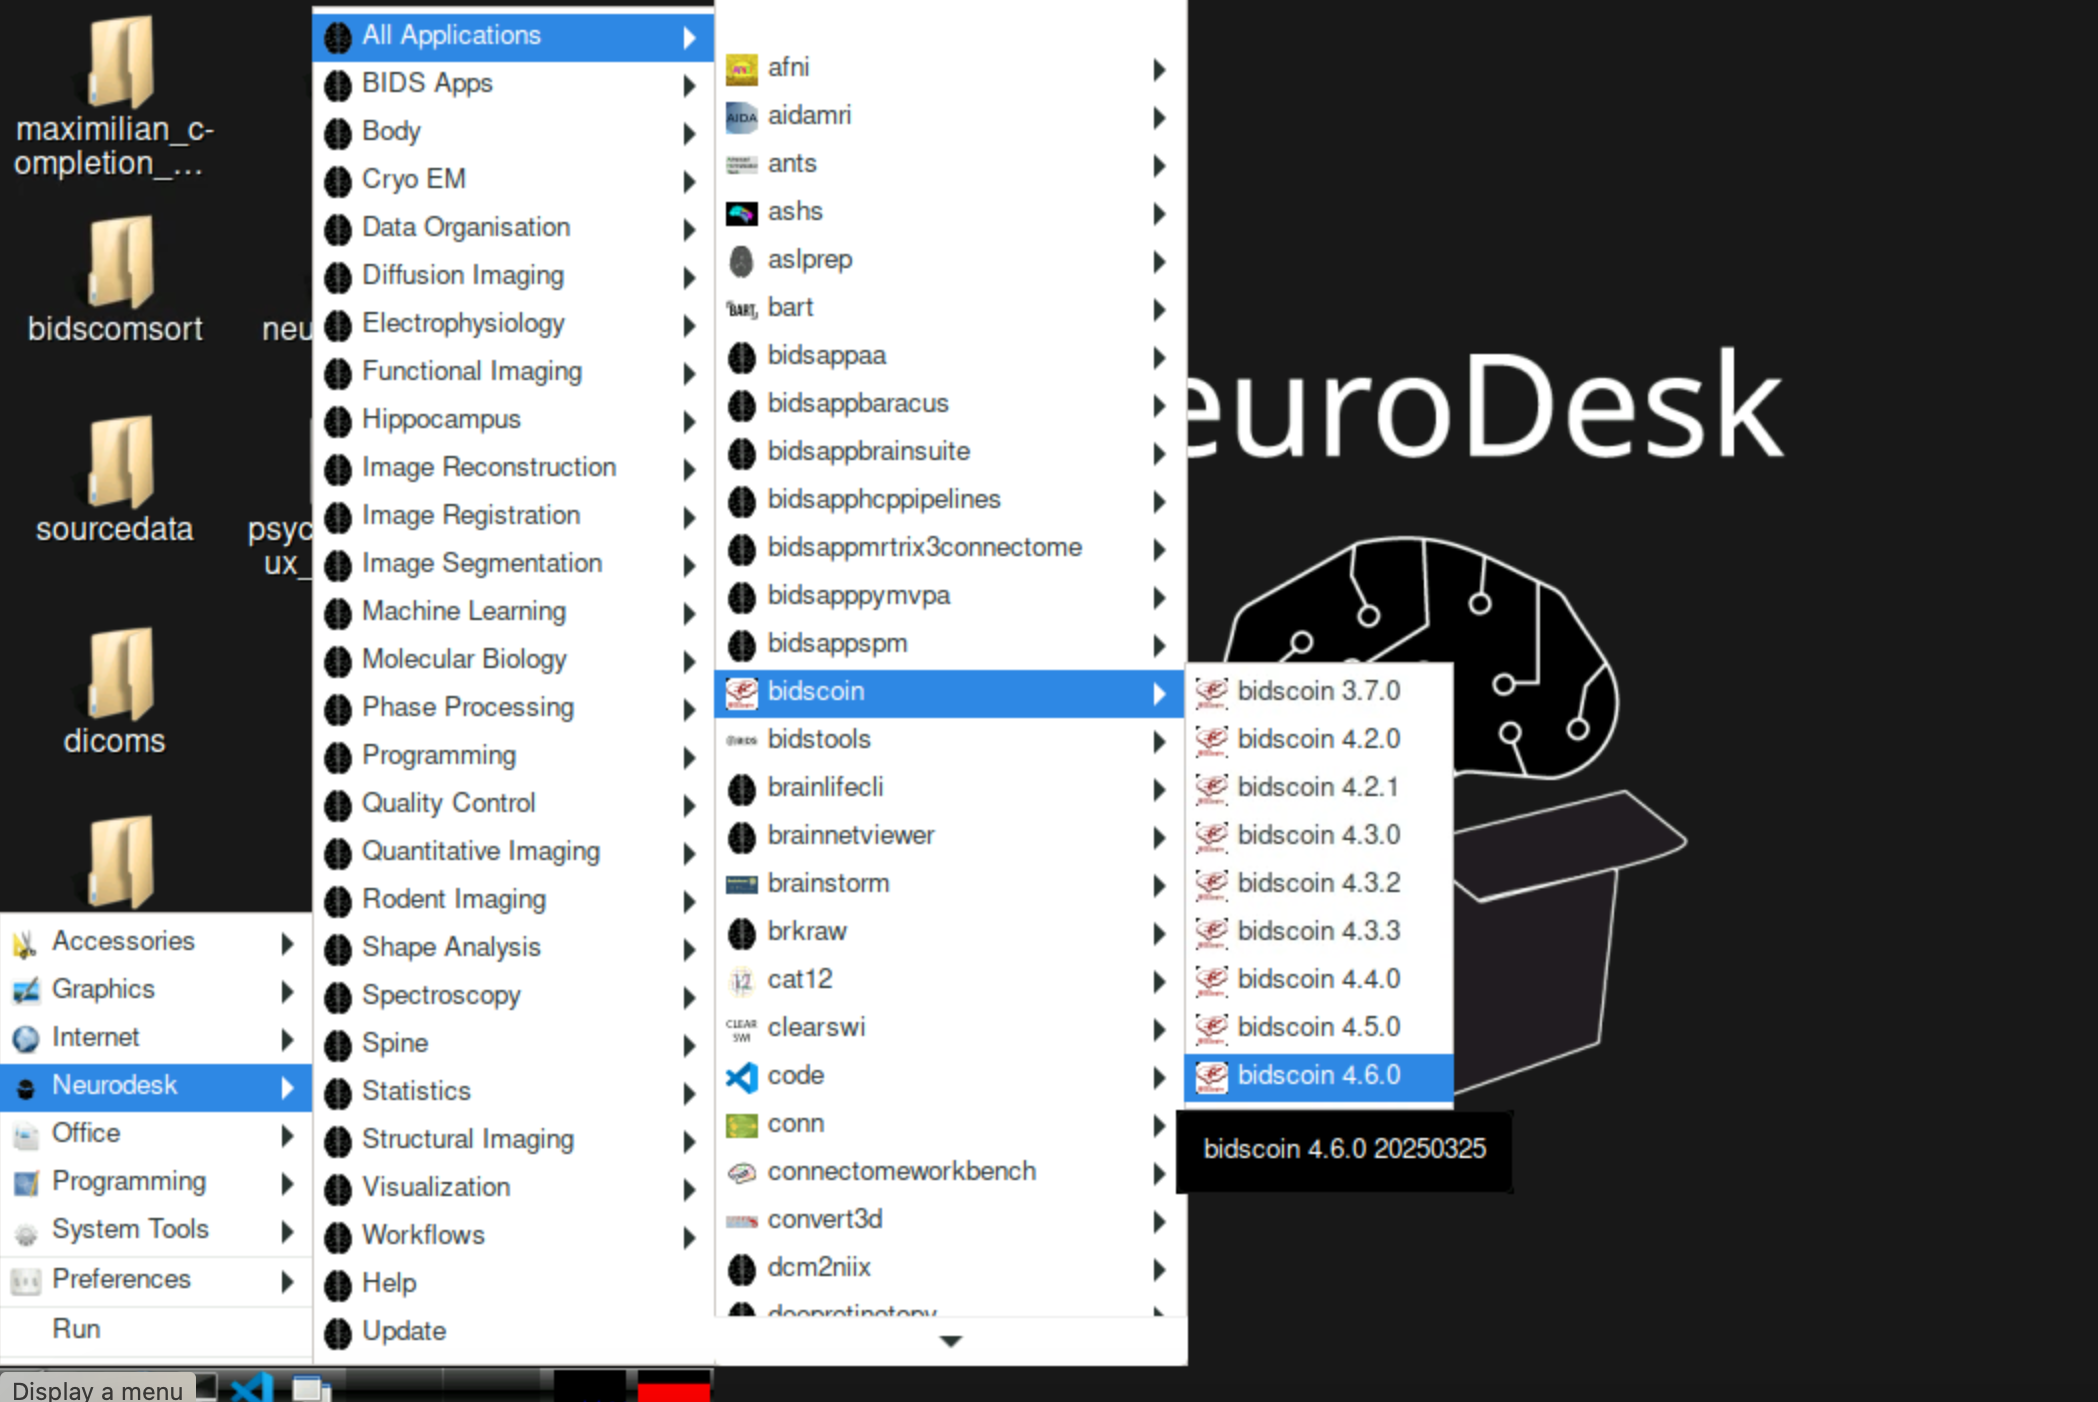
First, you need to start through the bird-icon on the bottom left of neurodesk, navigate to Neurodesk > All Applications > bidscoin and select a version (the process has been tested with v4.6.0 & v4.6.1):
3.2 Shell commands
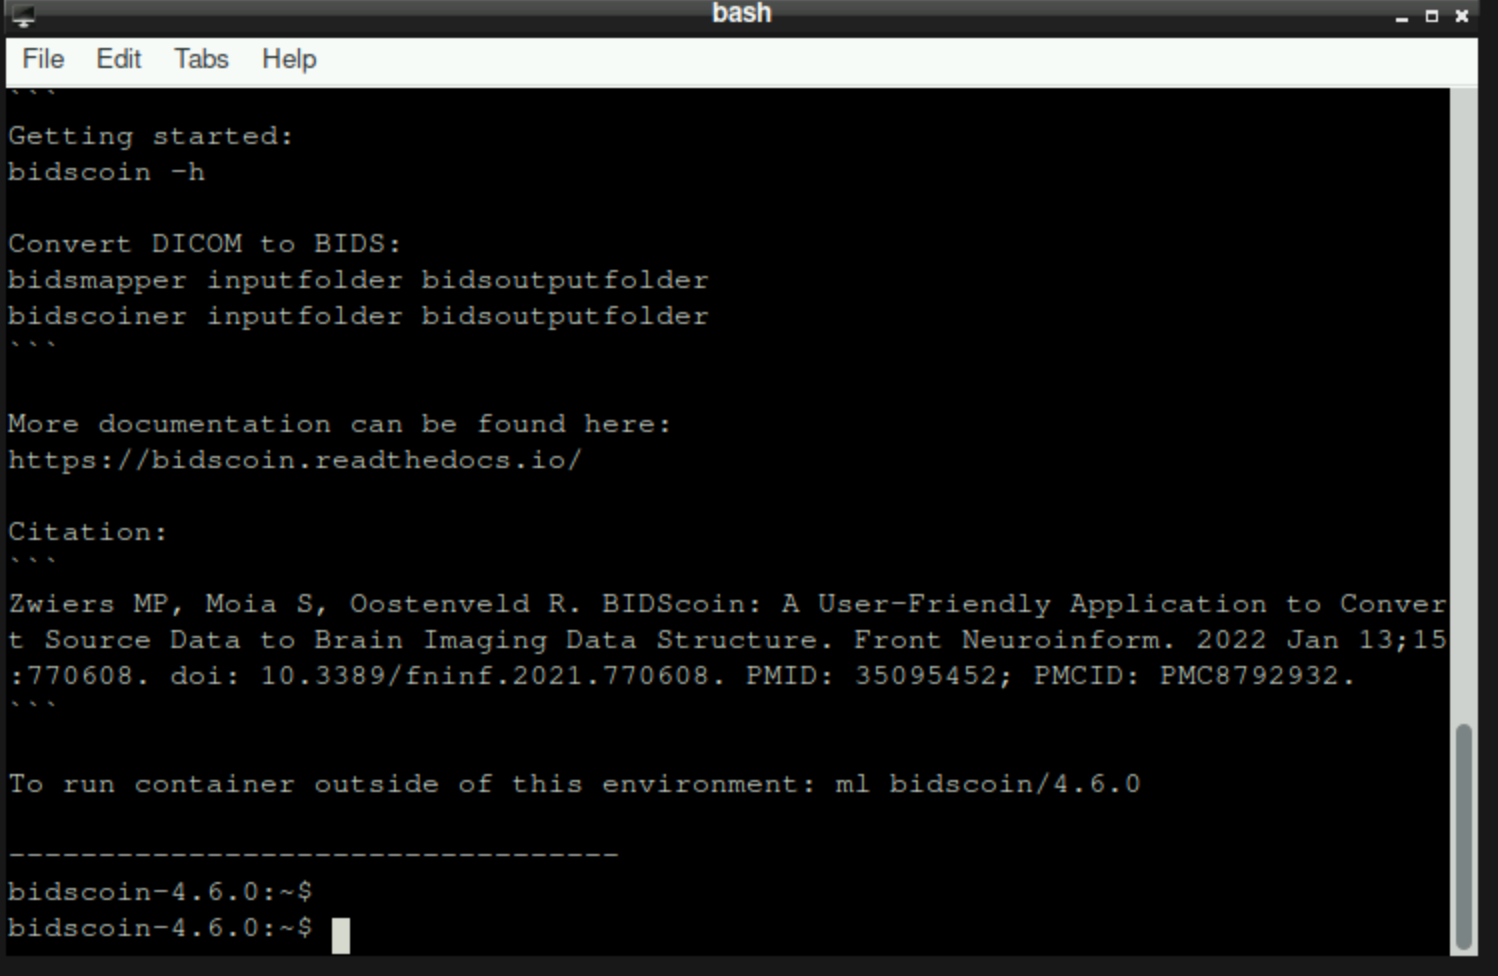
After some time to load, it should look like this:
Subsequently, it can be easier to first copy/paste the directory /shared/dicomsort to your own directory, before following the script below (= /shared/website/dcm2bids_coiner.sh). You can either adapt it once and run the whole script, or run the lines in the bidscoiner-terminal step-by-step (potentially helpful to find problems).
Quick explanations:
sourceFolder= the directory “DICOM” that contains the various subdirectories containing the DICOM filessortedFolder= initially empty folder where the sorted DICOMs will be stored in./dicomsortthe directory containing the scriptsdicomsort.py&DICOMsort.sh
After running the second to last line (starting with bidsmapper) you might have to do additional steps described below!!!
#!/bin/bash

# you can copypaste the following commands into the terminal window that is opened by BIDSCOINER

# define directories
sourceFolder=/home/jovyan/completion2/dcm
sortedFolder=/home/jovyan/completion2/dcm_sorted

# check the output of the source folder
ls -l $sourceFolder

# make the target directory with subdirectories
mkdir -p $sortedFolder

# change to the script folder
cd /home/jovyan/dicomsort/

# run the script
./DICOMsort.sh $sourceFolder $sortedFolder

# check the output of the target folder
ls -l $sortedFolder

# run bidsmapper
bidsmapper $sortedFolder /home/jovyan/completion2/bids
# note: in the intendedFor of the fieldmap, add func/sub-001_ses-1_xxx_bold.*

# once you are happy with the mapping, run bidscoiner
bidscoiner $sortedFolder /home/jovyan/completion2/bids
3.3 bismapper
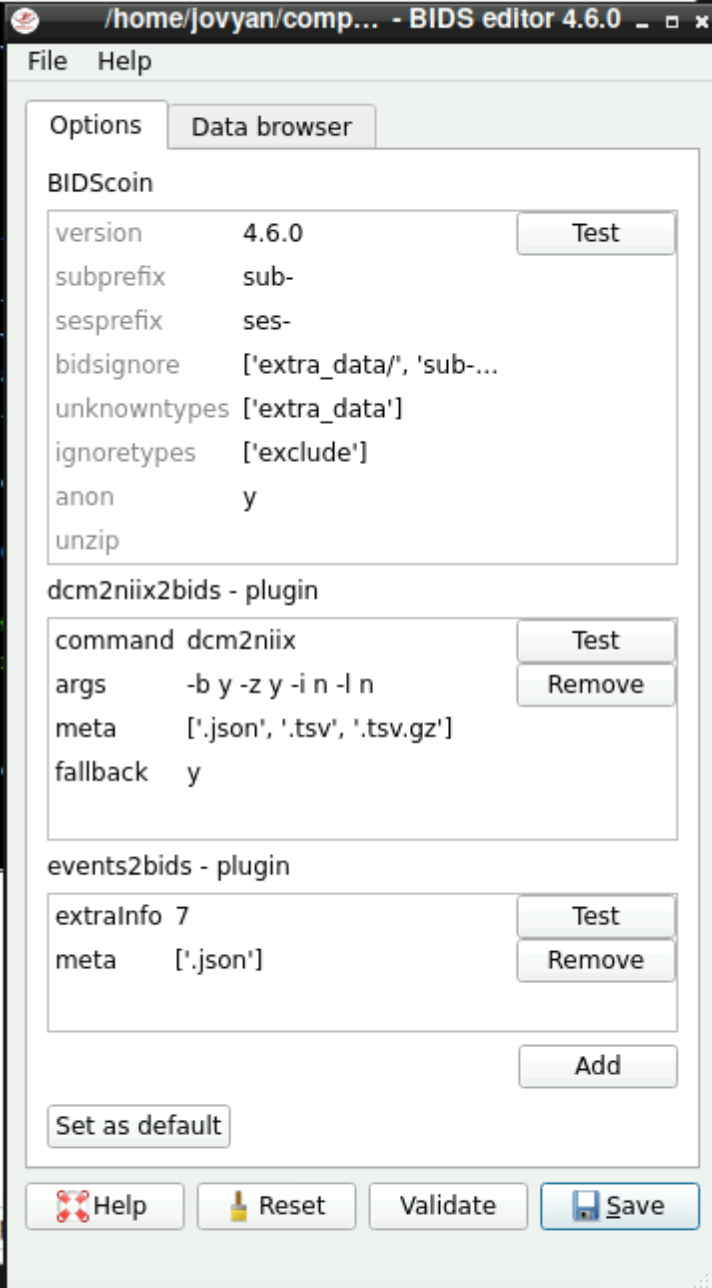
After running the bidsmapper command, a window as in the image above should open. Currently, to discover the data we need to first delete the content of the “subprefix” field and then save the bids map in the default location. After this, run the same bidsmapper command again and continue below.
3.3.1 Subject and session
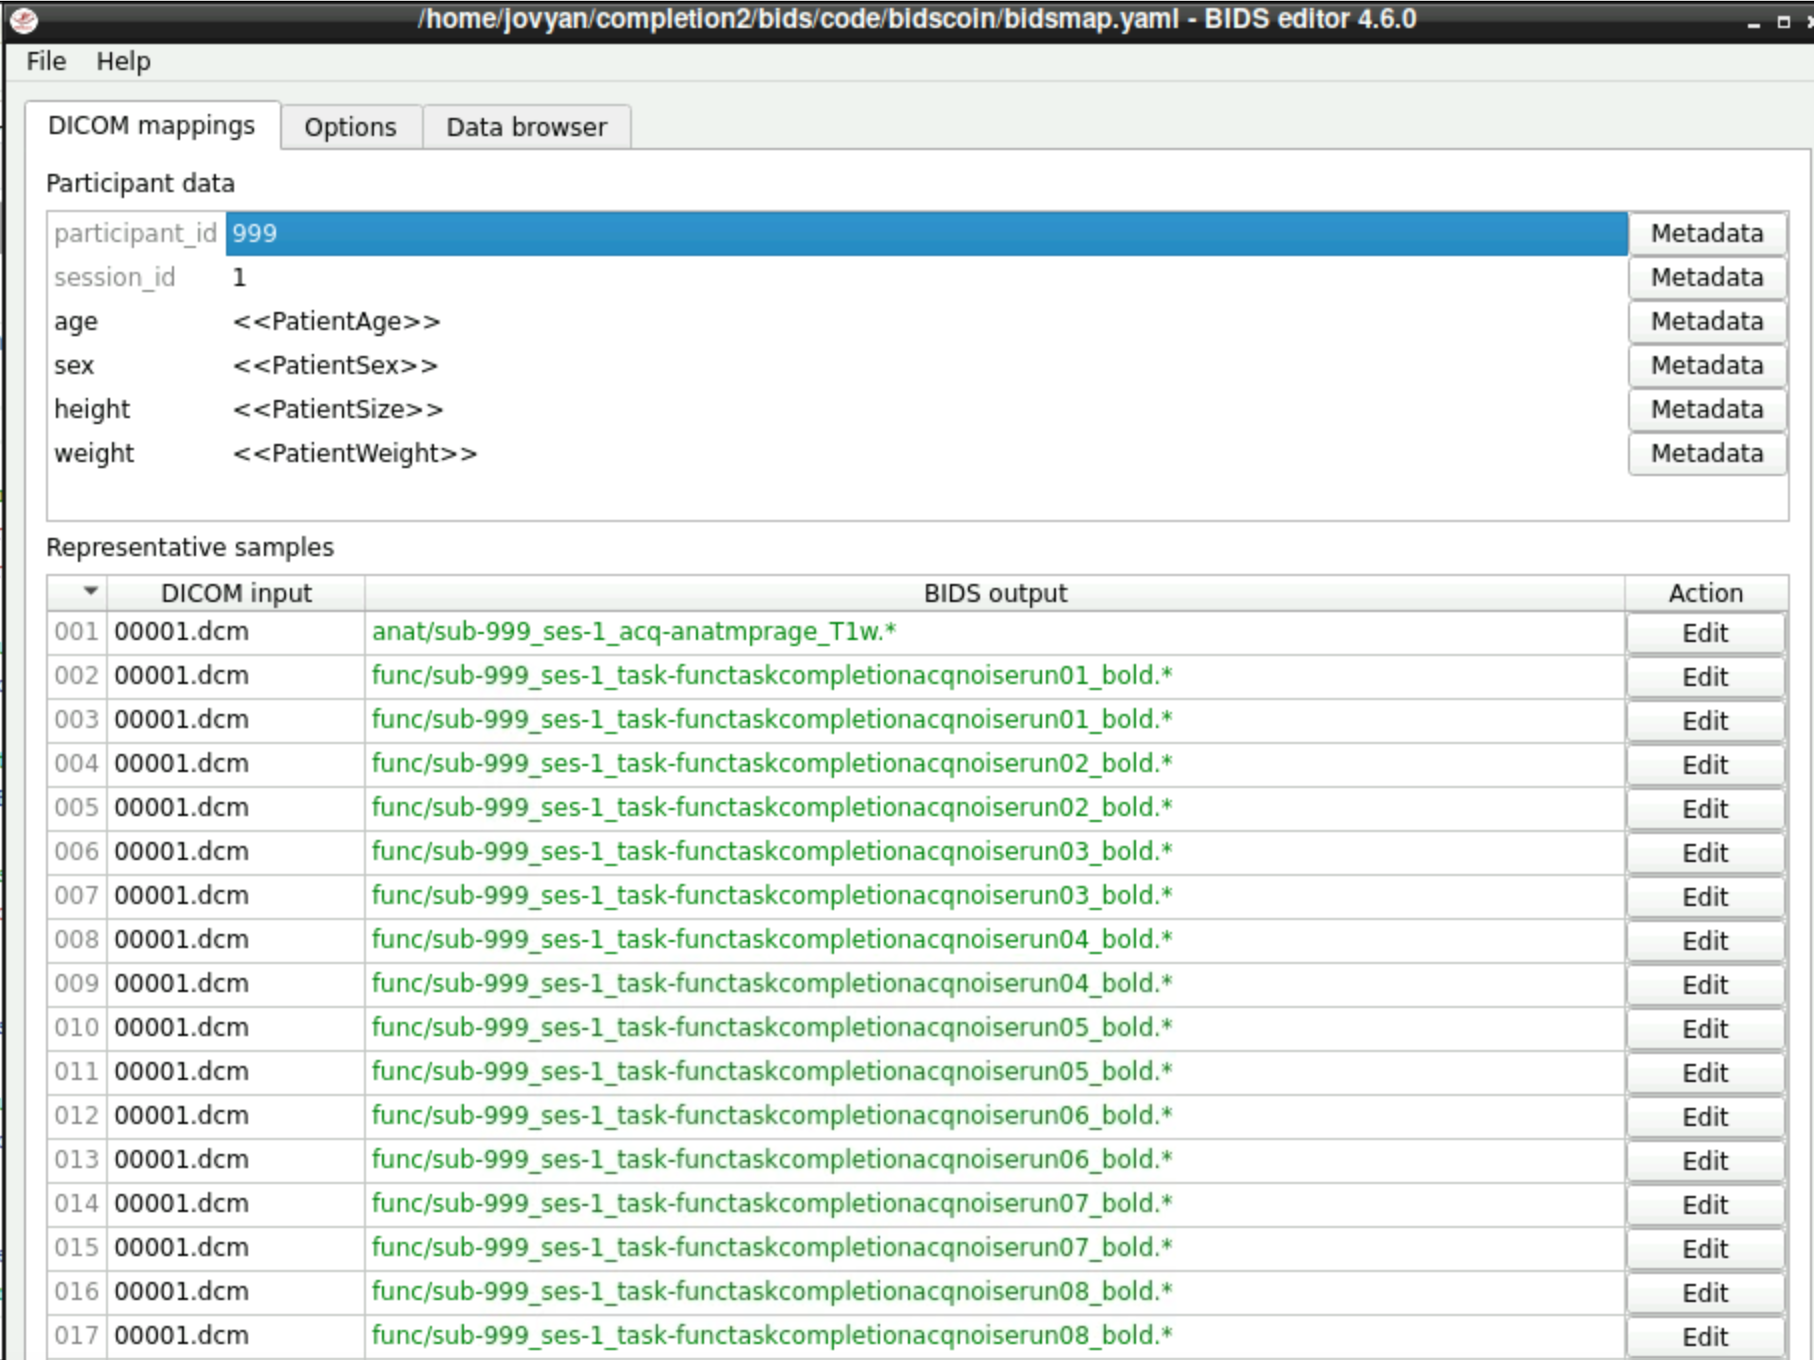
Now bidsmapper discovered everything, but the files are not named correctly.
\(\to\) Edit subject and session (“Metadata”) first
Afterwards you need to rename the individual files by clicking “Edit” next to every file.
3.3.2 Editing file names: anatomical
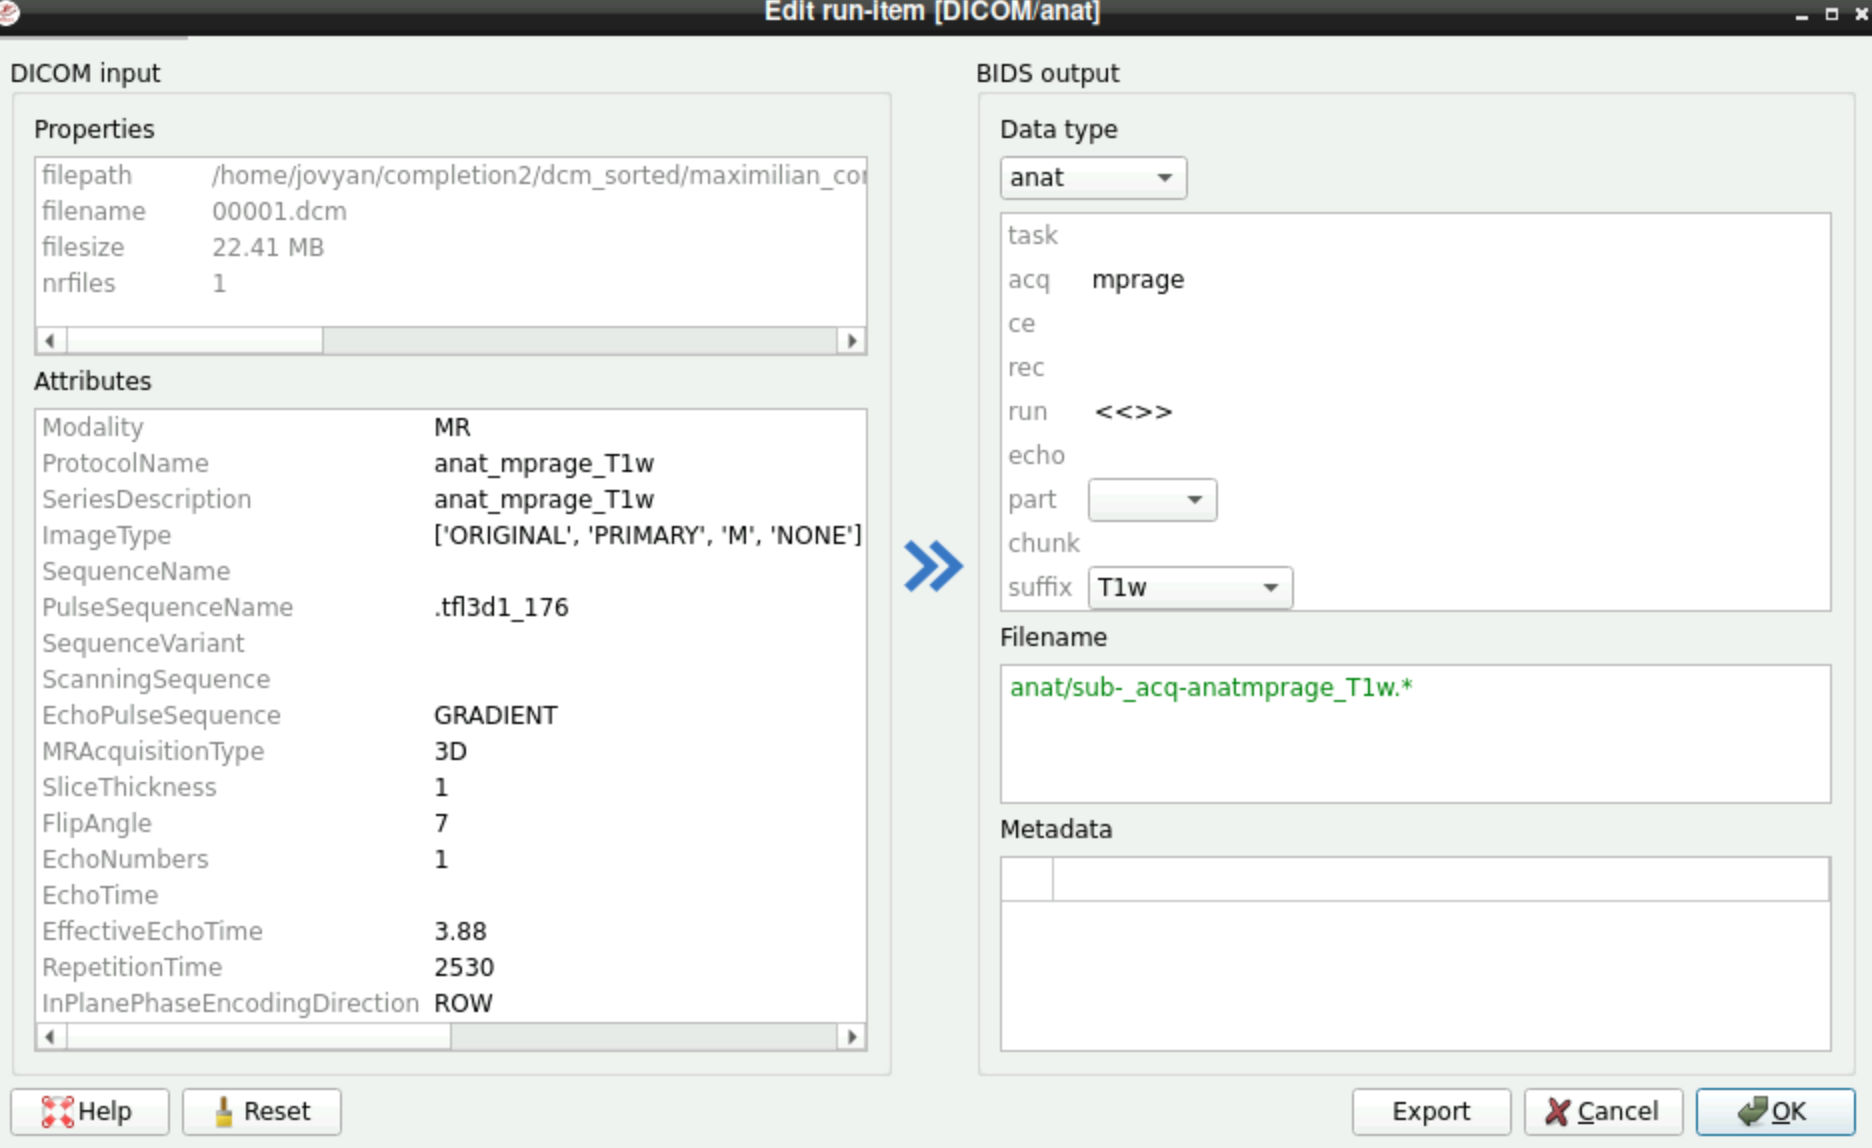
anatmprage \(\to\) mprage in the “acq” filed
3.3.3 Editing file names: functional
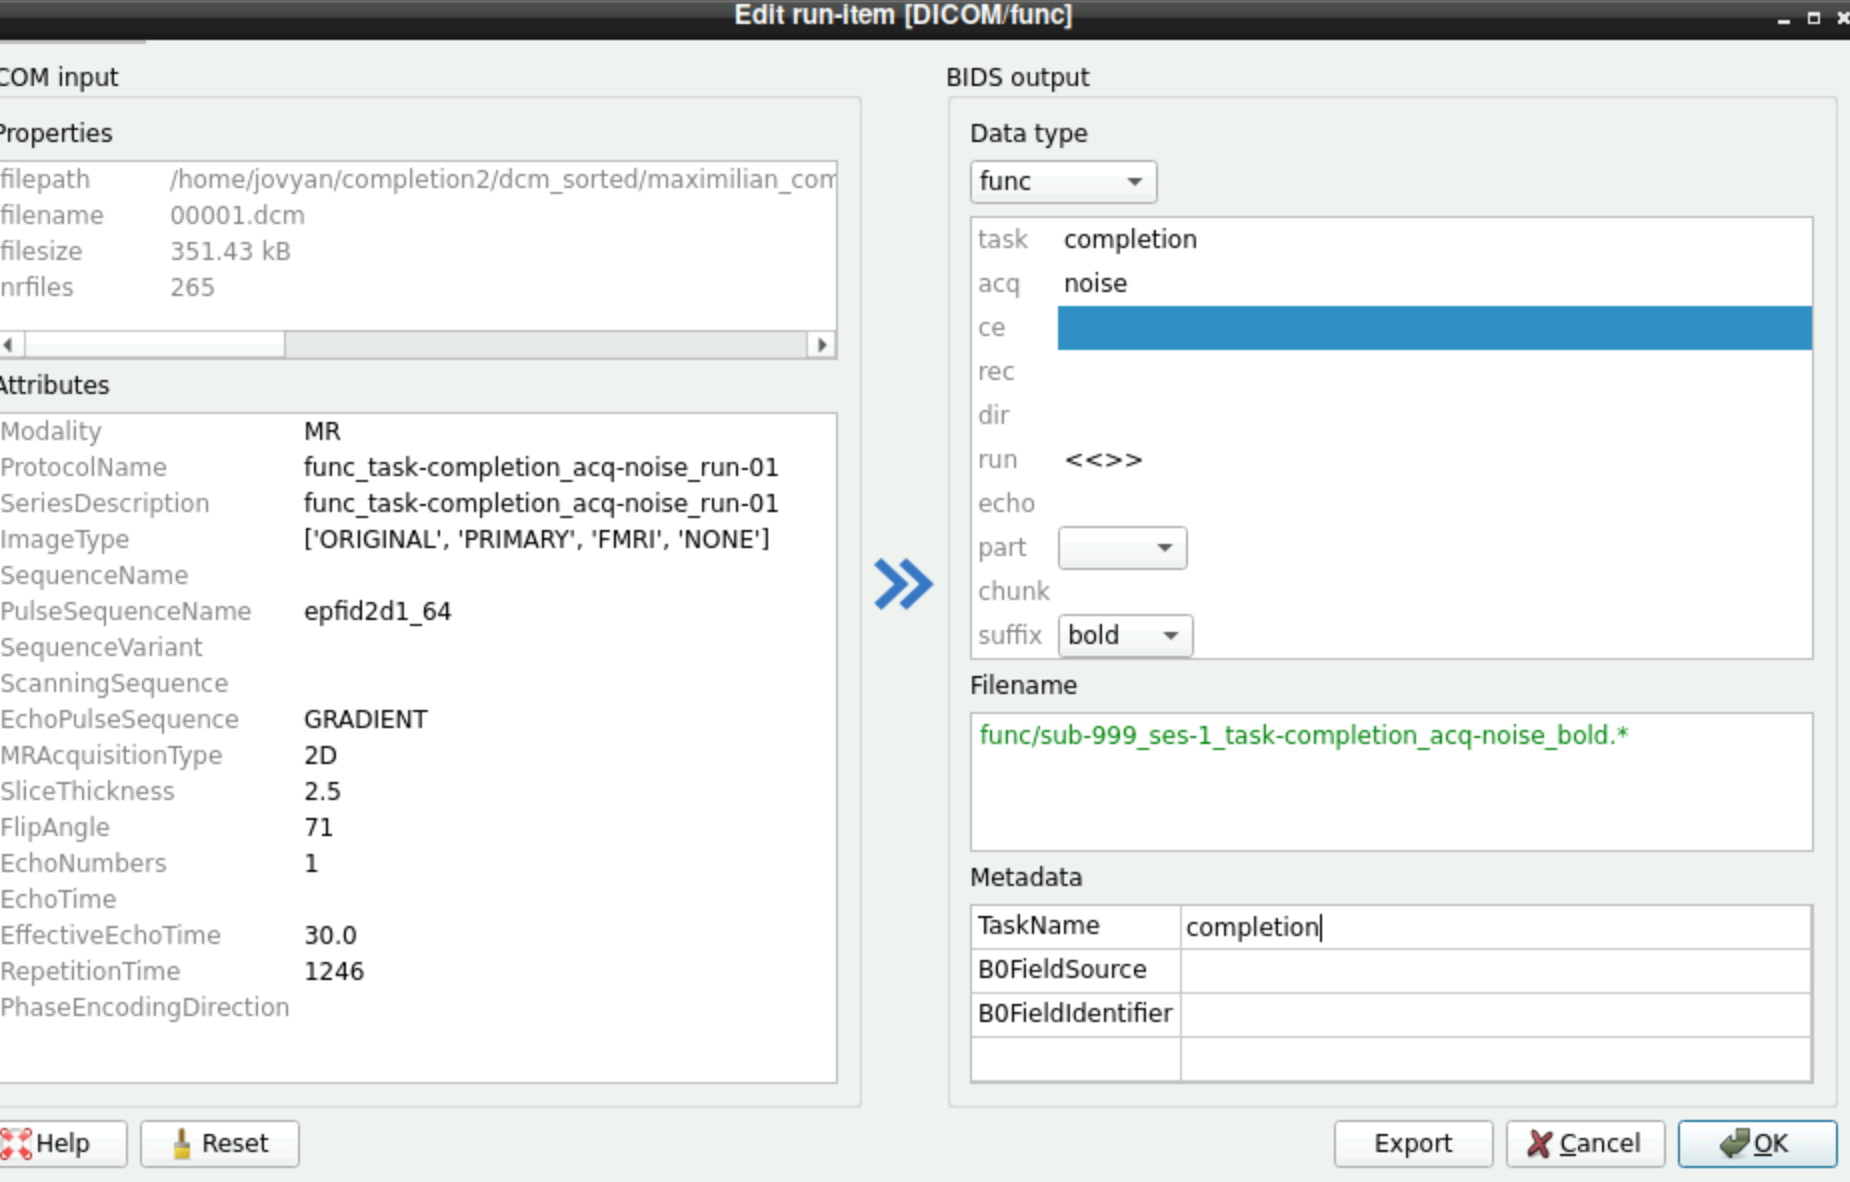
Edit the task name and acq field
You need to do this for every functional file!!
3.3.4 Editing file names: fieldmap
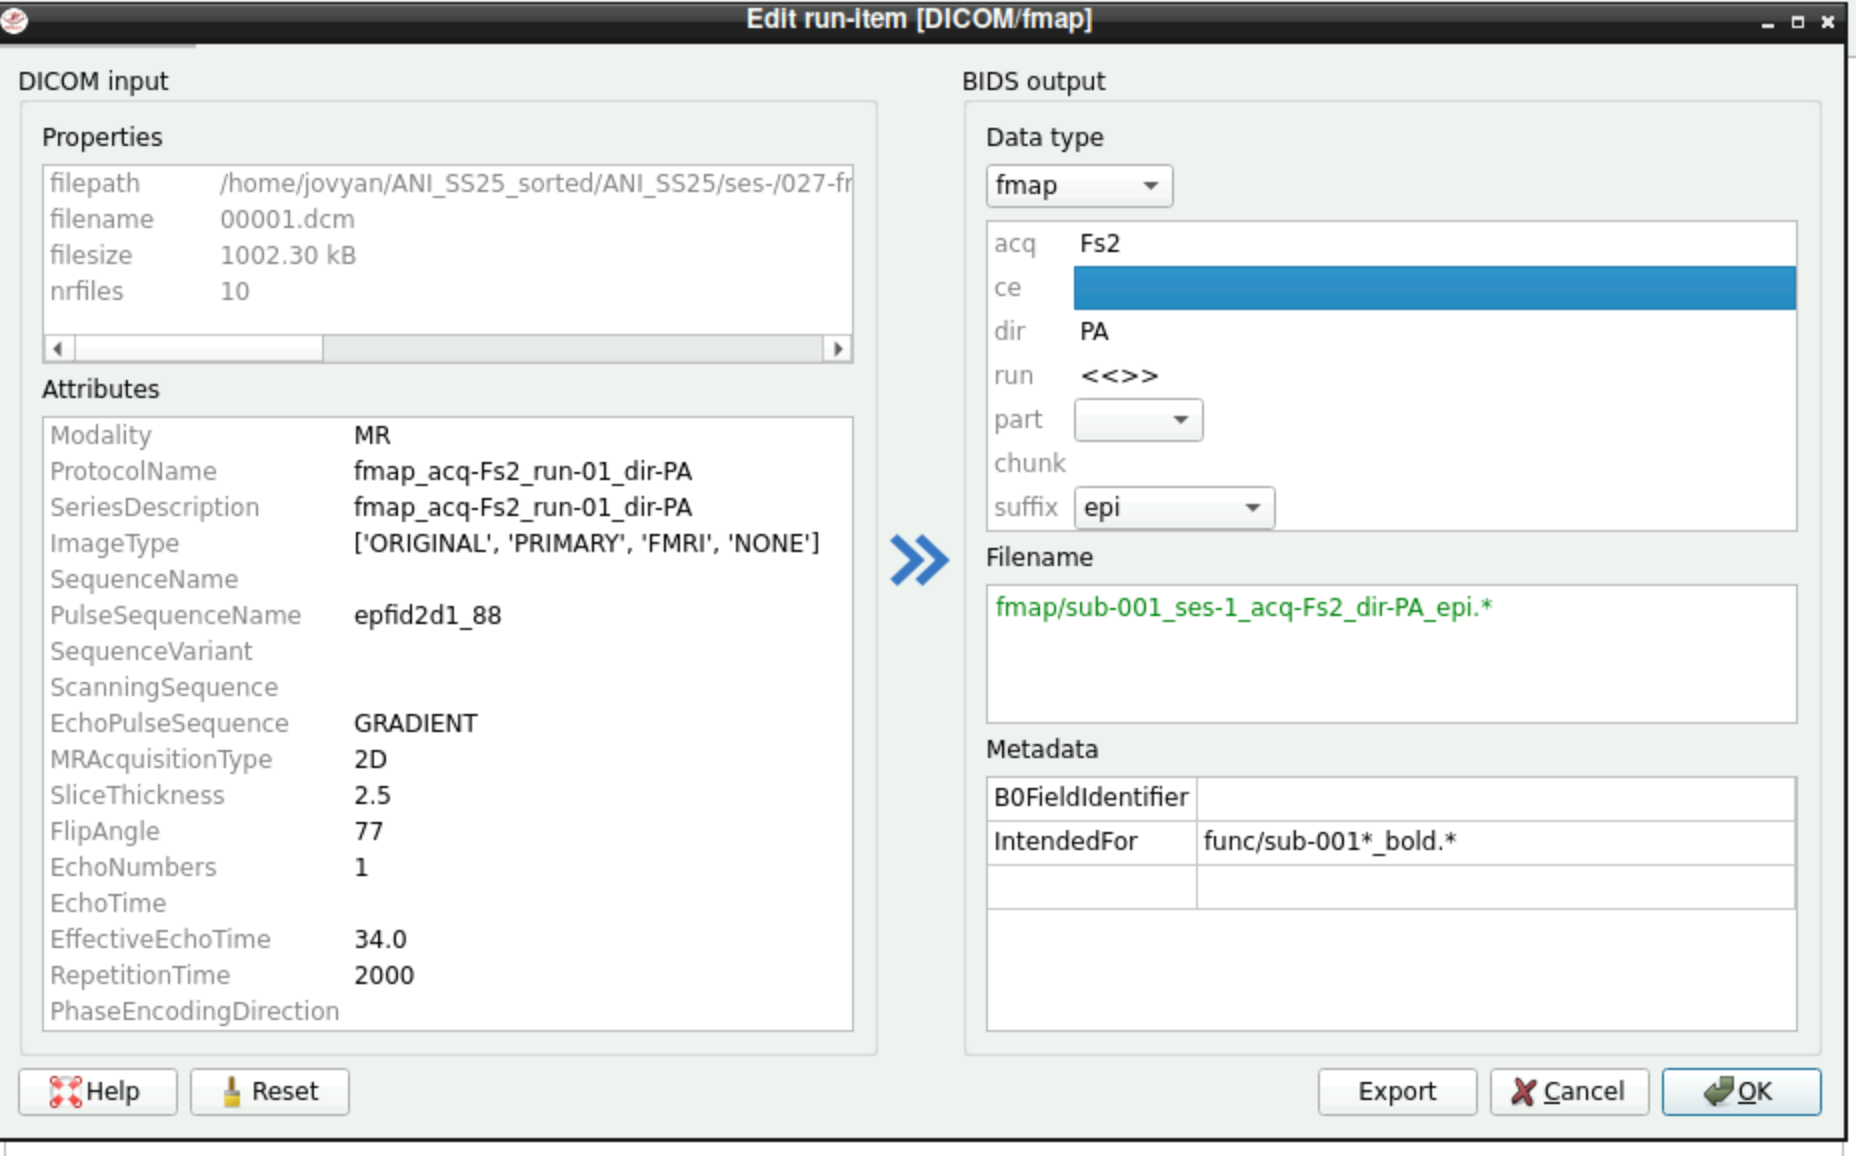
We often need the option “epi” in the selection field of “suffix” (and not the “fieldmap” option)!
In the section “Metadata” you have to add which files should be selected for the “IntendedFor” field of the fieldmap. You can use a wildcard (*) to select all respective functional runs: func/sub-001*_bold.*. This includes all files in the directory func that start with sub-001 and somewhere in the filename include _bold.. Watch out if you have more than one session! Then you might need to specify the respective session as well, e.g. func/sub-001_ses-3*_bold.*
3.4 run the bidscoiner command after renaming all files
Once you are happy with the naming of the files, run the bidscoiner-command to do the actual conversion
3.5 View files
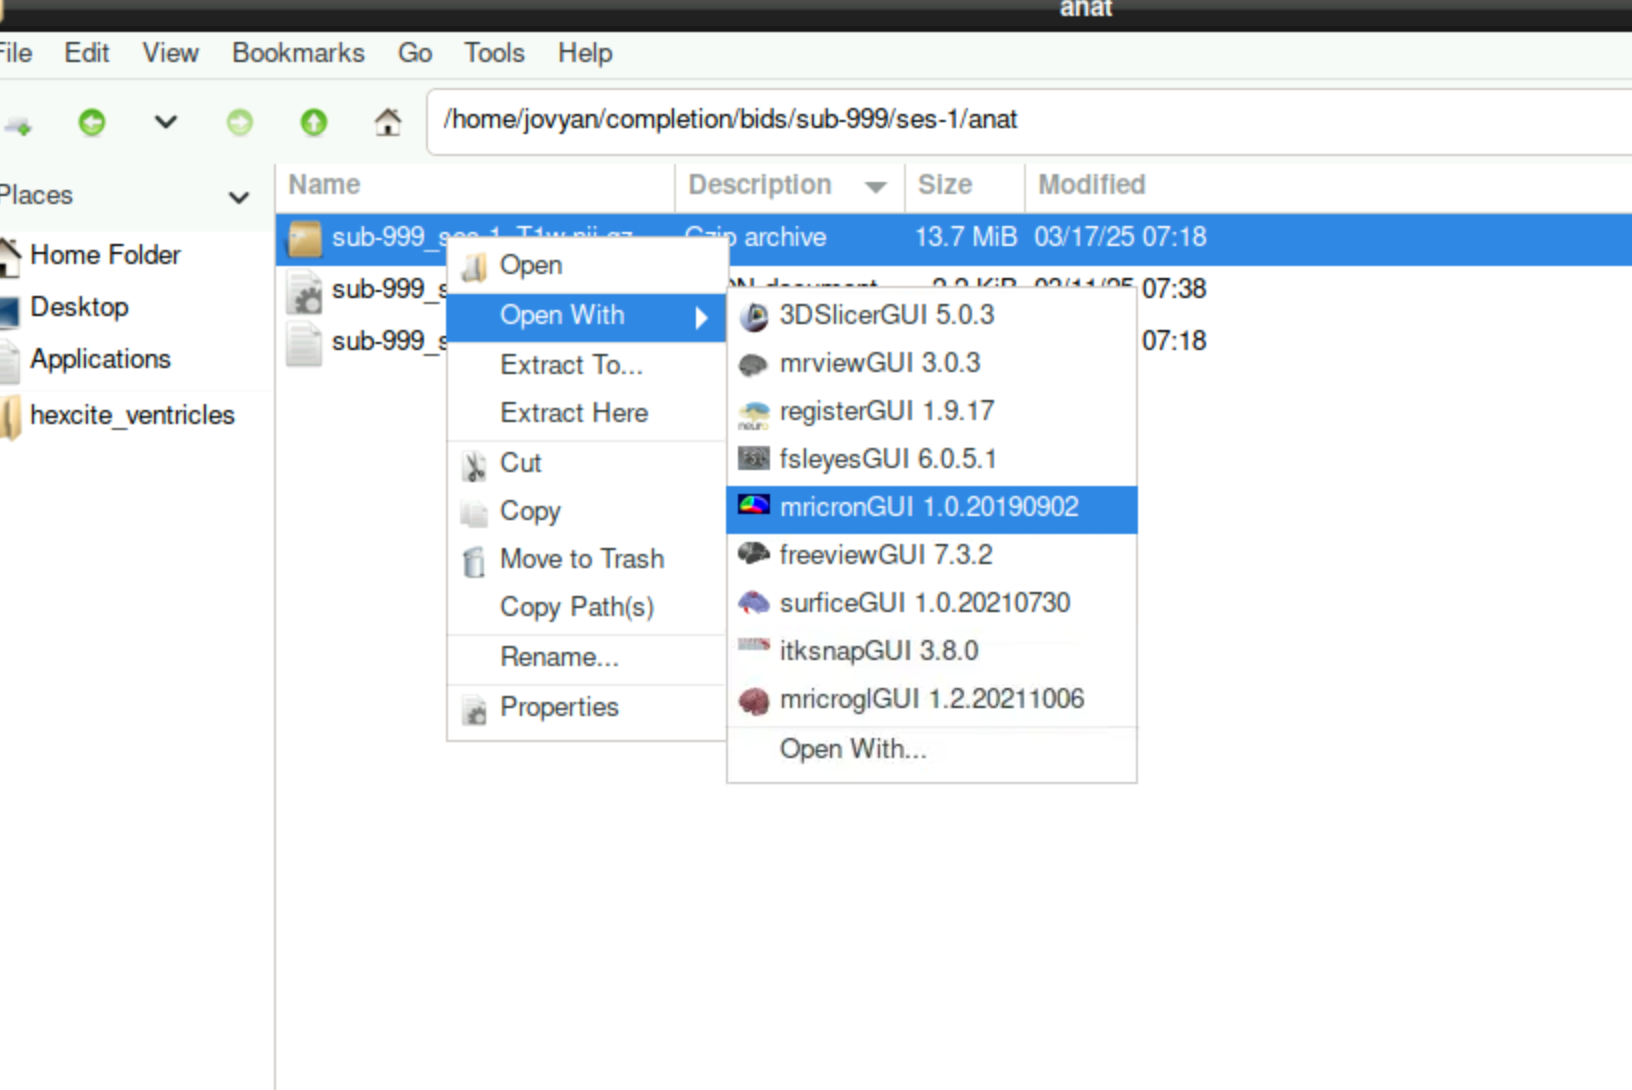
3.6 MRICron
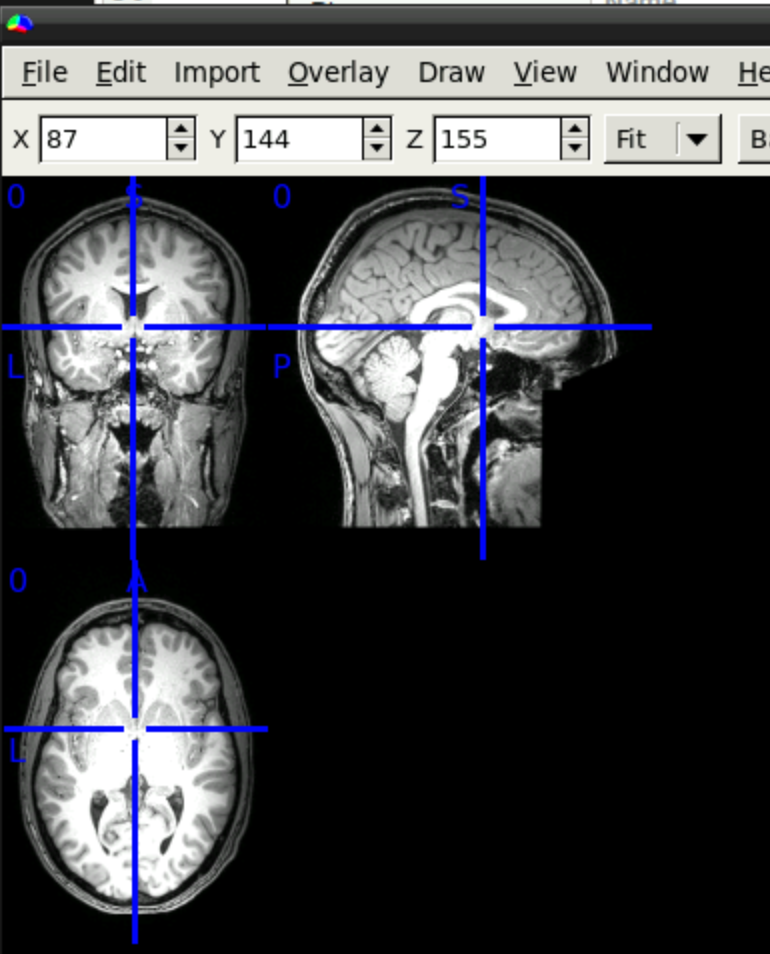
Now you can view the nifti files with any suitable software (Hint: In the image above, you see a T1w scan that is already defaced! If you convert your DICOMs to niftis, the T1w-scan will probably look differently and you have to deface before continuing!)
4 From Dicom to nifti in BIDS format with Adam’s script
4.1 Preparations
4.1.1 Setting up the directory structure
First, you need to set up the correct structure for the script to run properly. For this, you:
Create an empty directory named
bids(right-click,Create New... > Folder)Create a directory (name can be anything, for example
dicoms) and copy/paste your folder with the DICOM-Files in this directory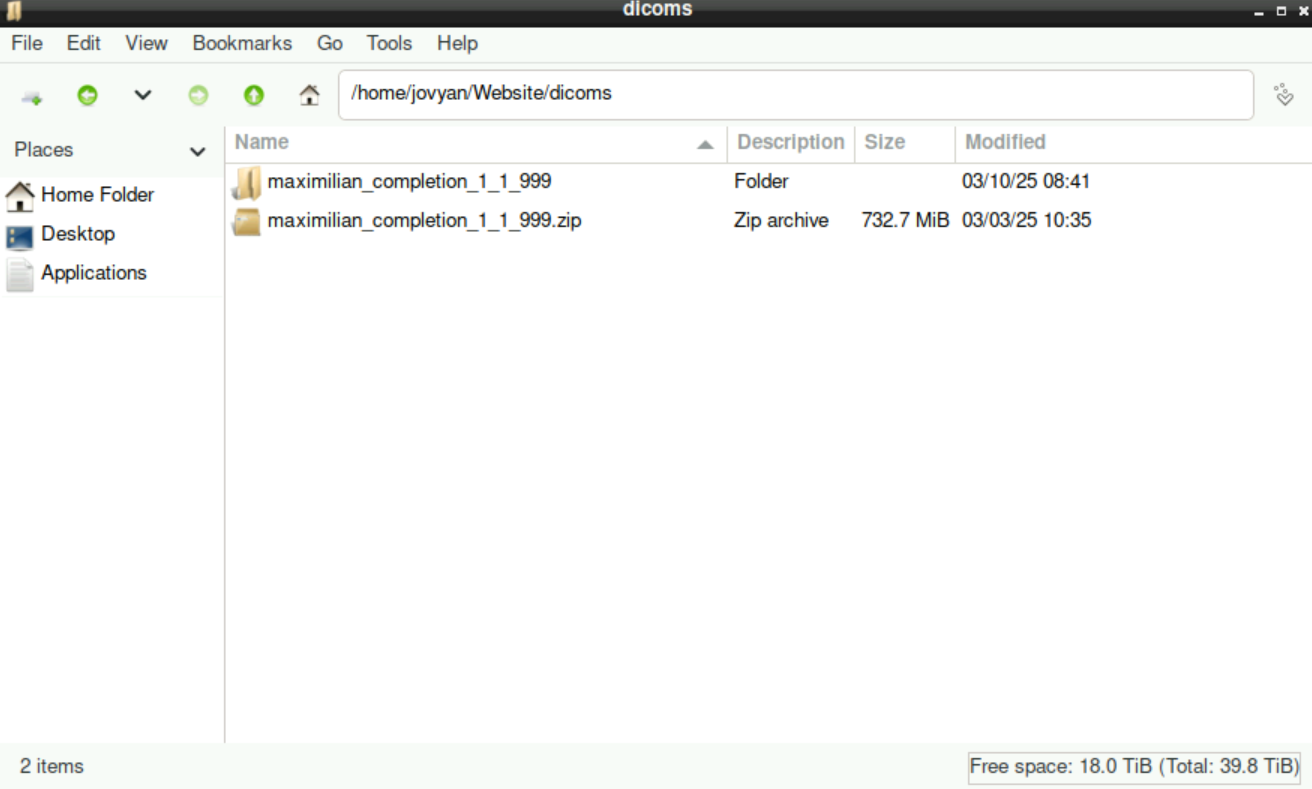
It should look like this: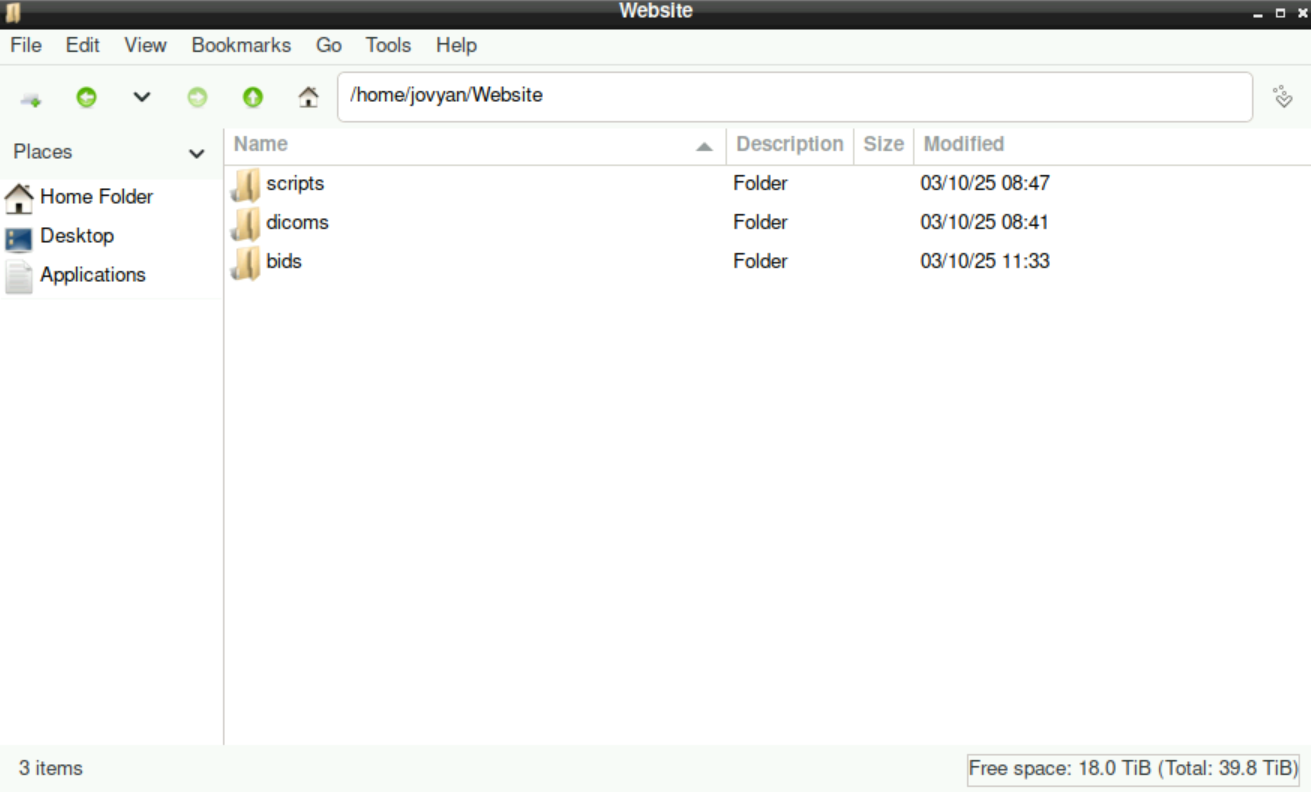
These two directories (bids & dicoms) need to be there for the script to work!
The directory scrips is not necessary for the script to run, but it may be helpful to gather and safe the scripts and notes that you need during the process from your raw files to the “final” analysis.
4.1.2 Naming of the nifti files
It is crucial for the BIDS format, that the resulting .nifti-files are named properly (see here for the naming convention(s)).
To ensure that later, it might be helpful to write down the proper names for the files before you start the process. This could be done in a simple .txt file, where you specify all the file-names. You can then just open this .txt file and copy/paste the file-names whenever you need them. To have everything at one place, you could save this file in your scripts folder as well.
4.1.2.1 Create a naming.txt file
navigate to your
scriptsfolder, right-click, selectCreate New > Empty File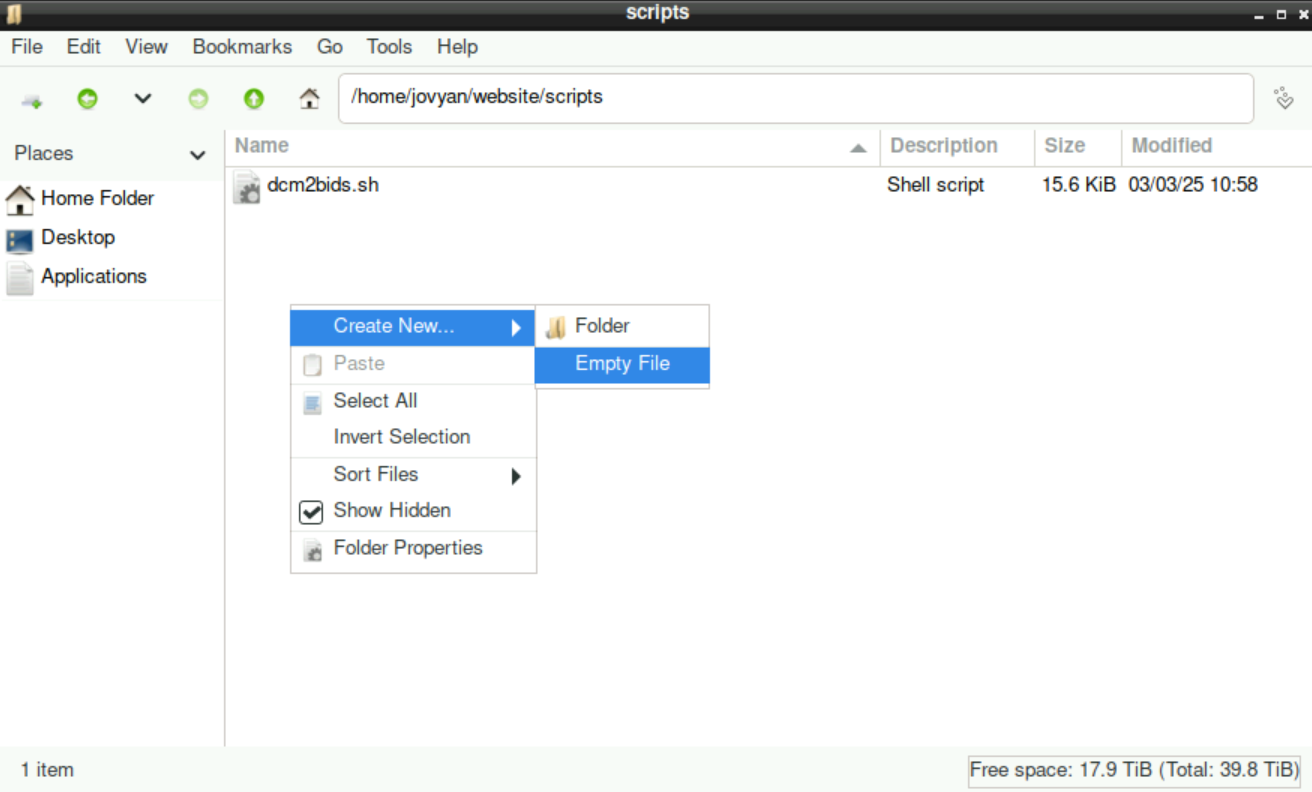
assign a name (in this case
naming.txt)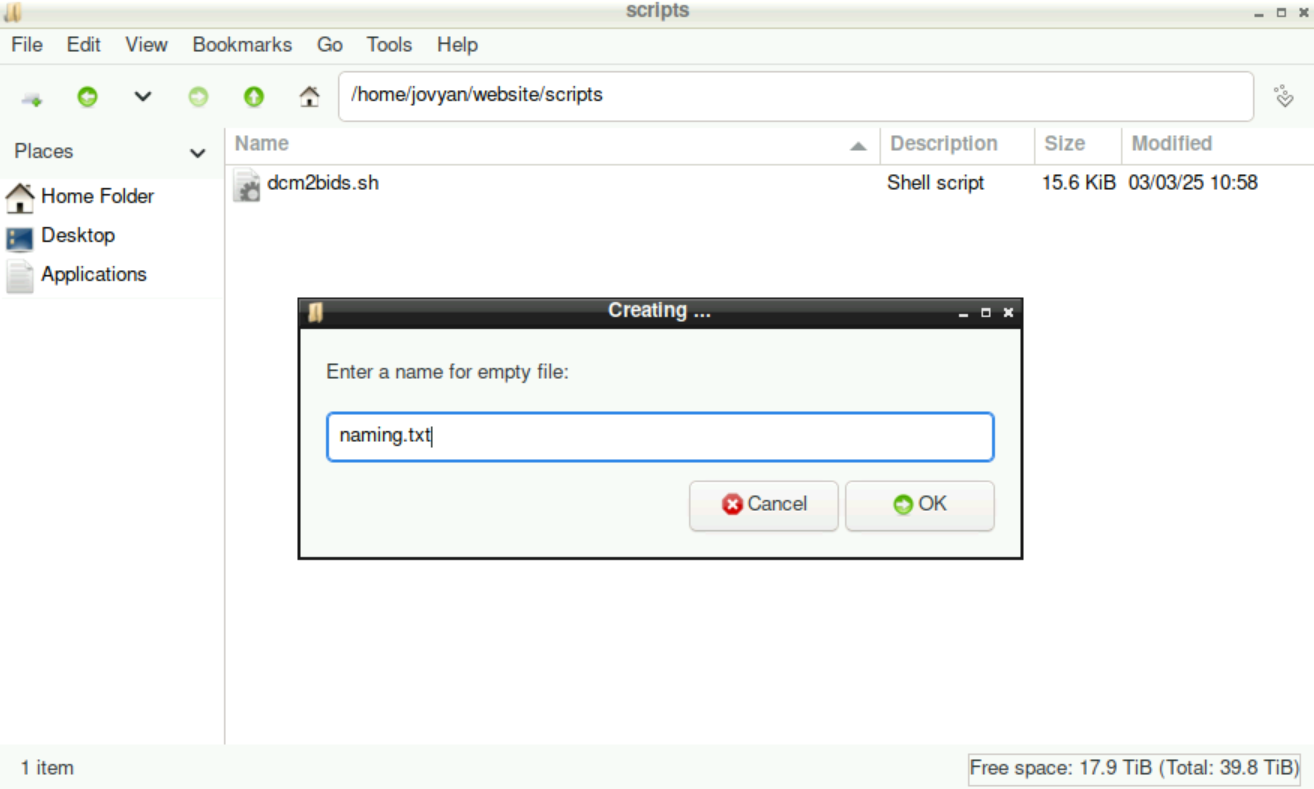
fill this text file with the proper, BIDS-conform names for the nifti files and save
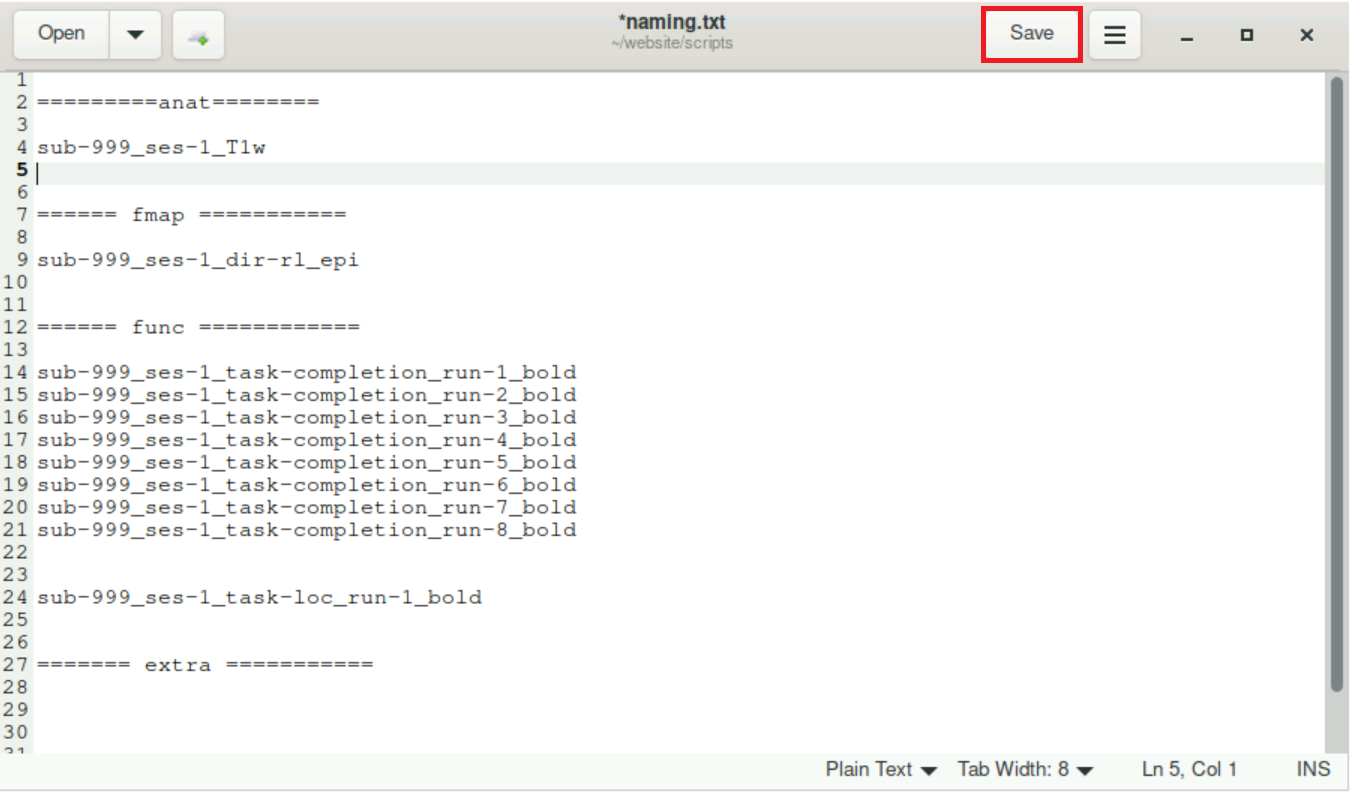 Now, you can just open this file when you need to change the name of a nifti.
4.2 Starting the script
Optional: copy/paste the script
/shared/website/dcm2bids_adam.shto your own directory. You can alternatively access the script directly.Navigate to the location of the script, right-click it, and select
Copy Path(s)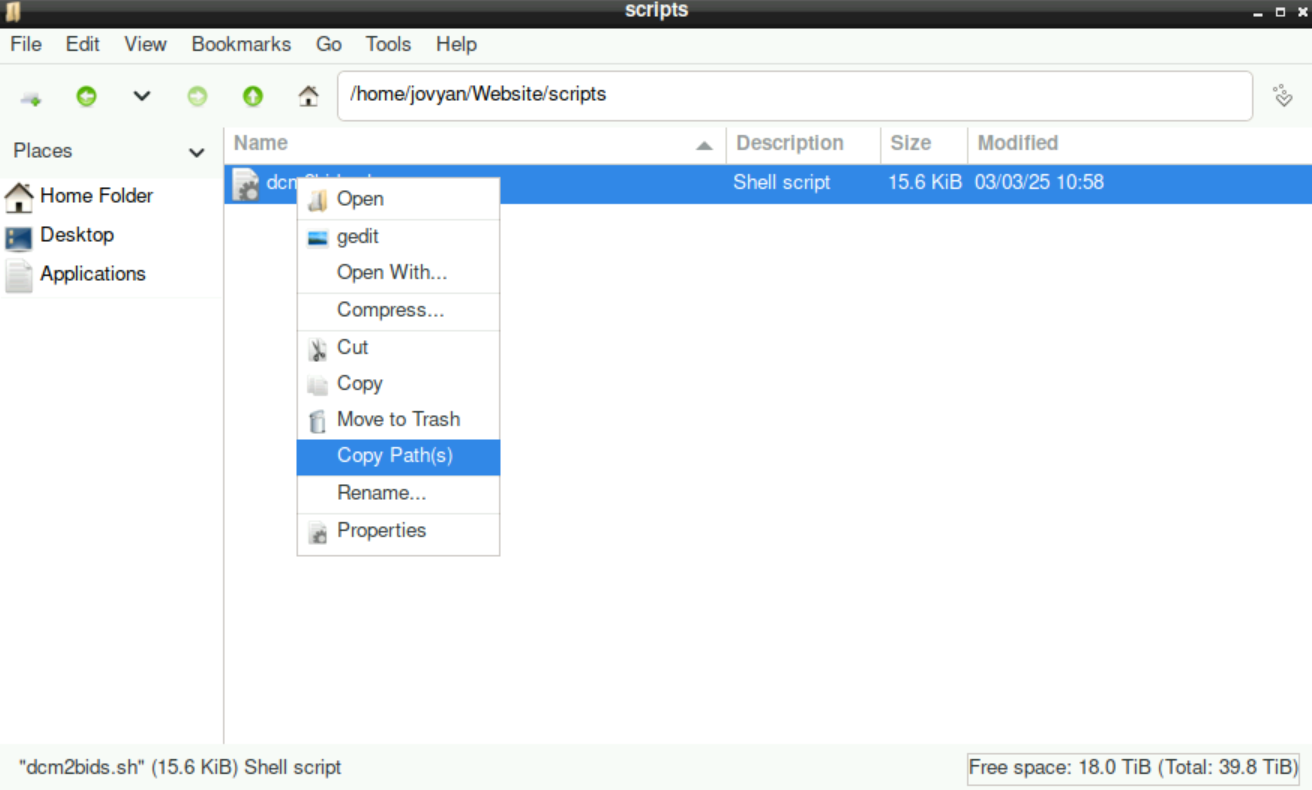
Open a Terminal (icon of a monitor at the bottom left of your screen):
Type
ml freesurferand press enterType
bash, add a space, then right-click and selectPasteto fill in the path to the script (or type in the path manually)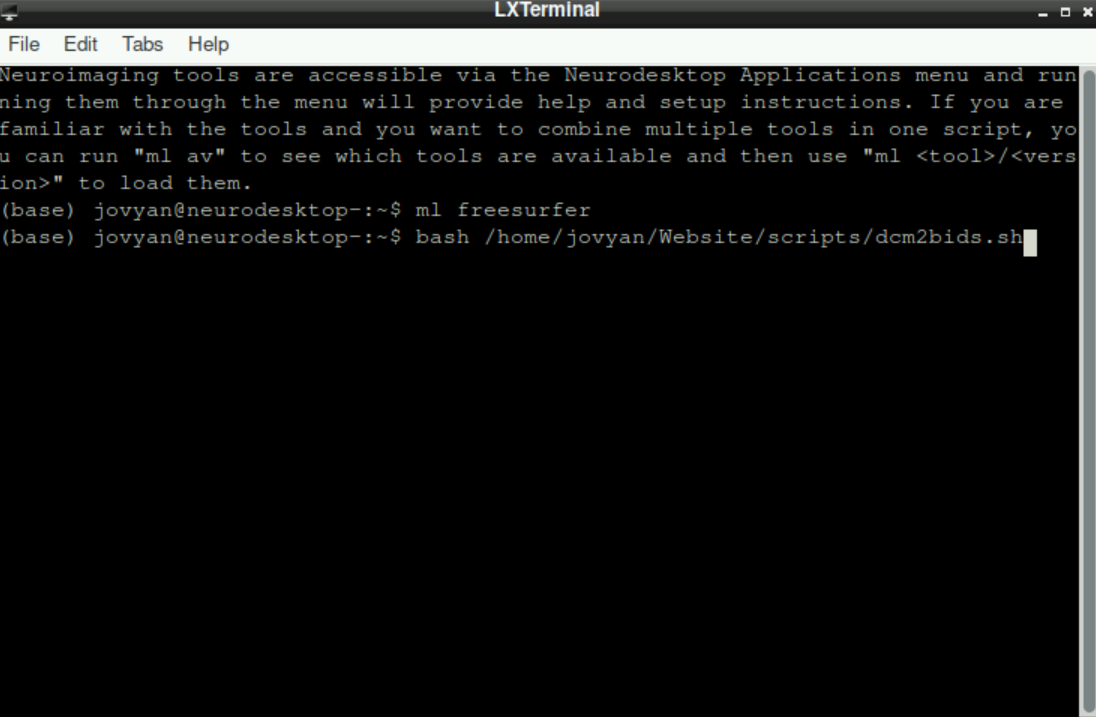 Press
Press enterto start the script.
4.3 (Installing all necessary packages)
It is possible (first time usage or after a server restart), that necessary packages are not installed. If this is the case, the script will tell you! If something is missing you´ll be asked, if you want to install these packages. By typing in y and pressing enter, the package will get installed (you might have to do this for more than one package):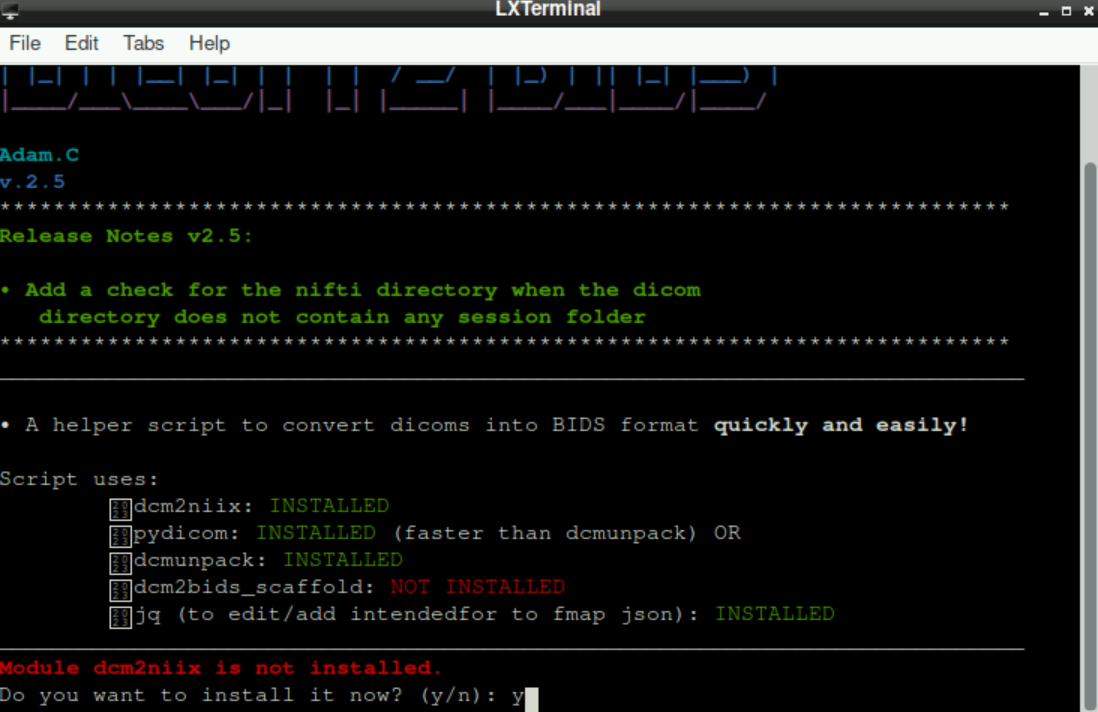
If there is still a missing package after all “automatic” suggestions of packages to install, it is probably related to dcm2bids_scaffold (but again, the script will “show” you that there is something missing). In this case, type pip install dcm2bids and press enter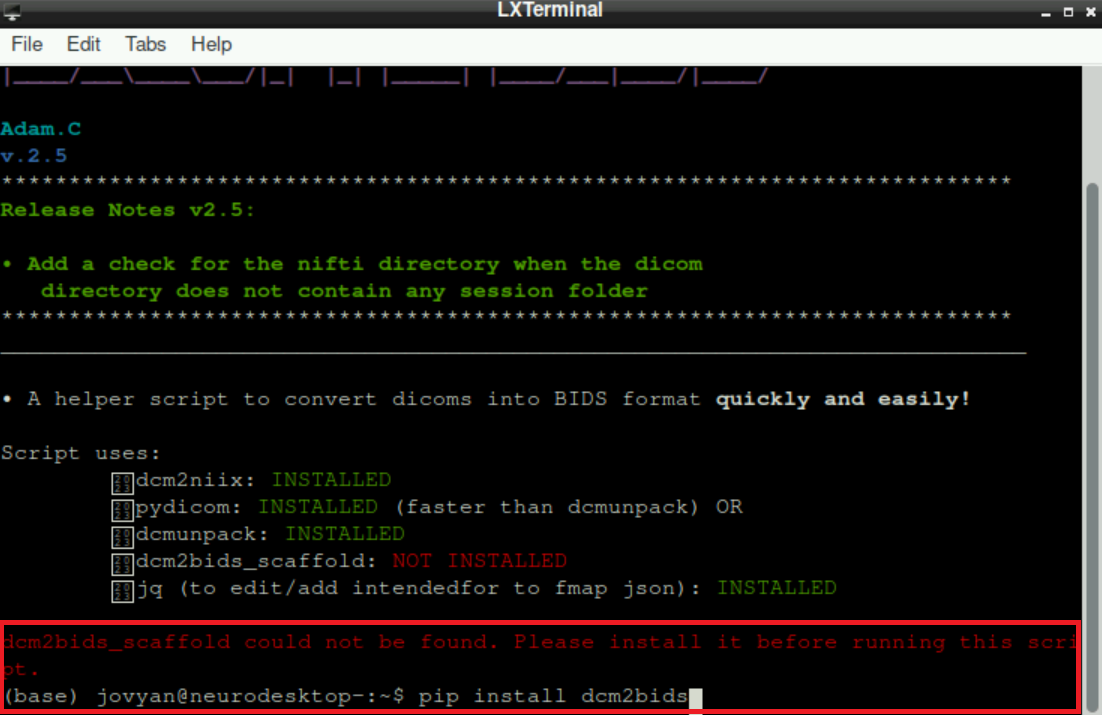
Now “restart” the script (see 2.d + 2.e): 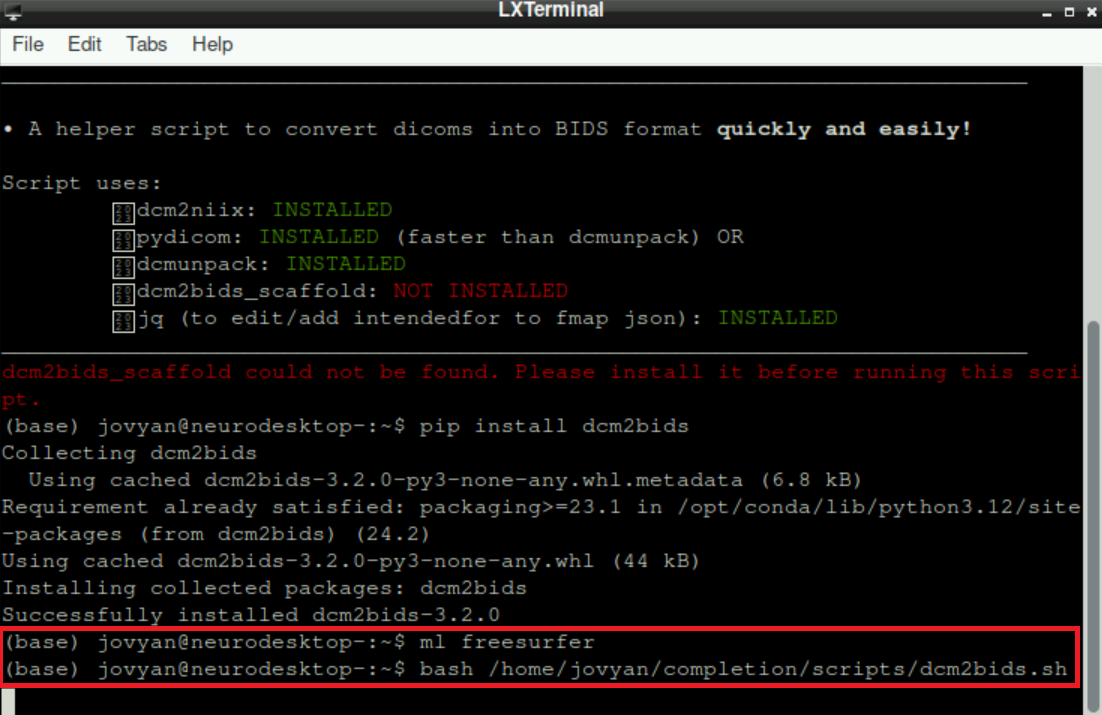
4.4 Preparation: Provide Input and Output Directory
With all necessary packages installed, you are asked to provide the path to the nifti directory. It should look like this: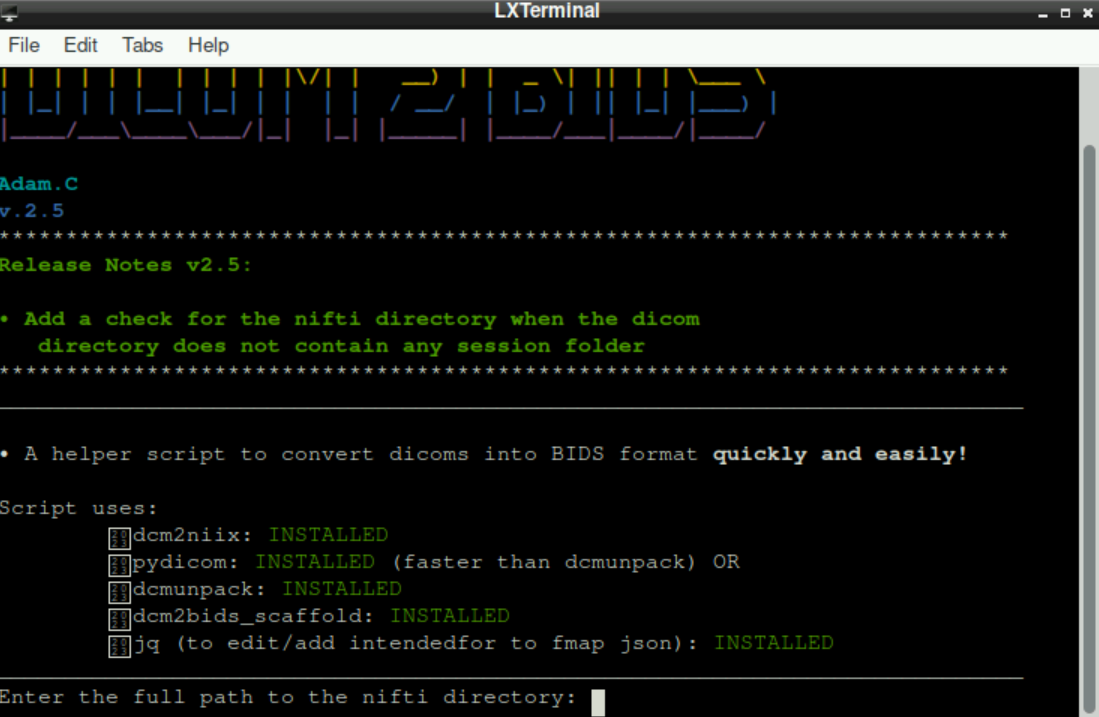
Nifti directory means the directory/folder, where the nifti-files should be saved to. This is our (currently empty) bids folder that we created in the beginning.
To indicate the nifti directory, we either type in the path manually, or get the path by navigating to the directory, right-clicking the bids directory and selecting
Copy Path(s)(same procedure as when we needed the path of the script)go back to the terminal window where
dcm2bidsis runningright-click and select
Pasteto enter the pathpress enter
Subsequently, you are asked to indicate the dicom directory.
\(\to\) Repeat the steps a)-d) for the dicom directory where your dicoms are stored (that we also created in the beginning)
When both paths are set, you are asked to choose a dicom name (basically the files of a participant; in this case, there is only one scanning-session, but if you have more than one subject, you can select the one that you want do process) and it should look like this: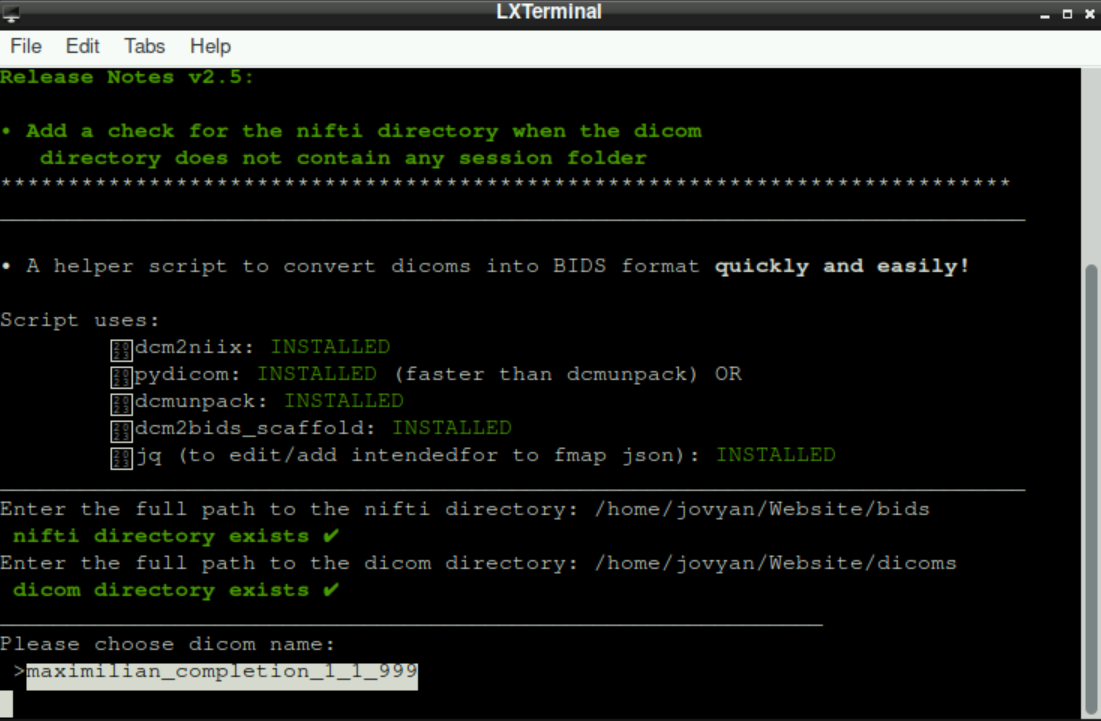
After selecting a subject/dicom name (Press enter), the script automatically suggest a BIDS “subject id” and asks if it is correct (Watch out! Generally the suggested ID is not BIDS-conform!)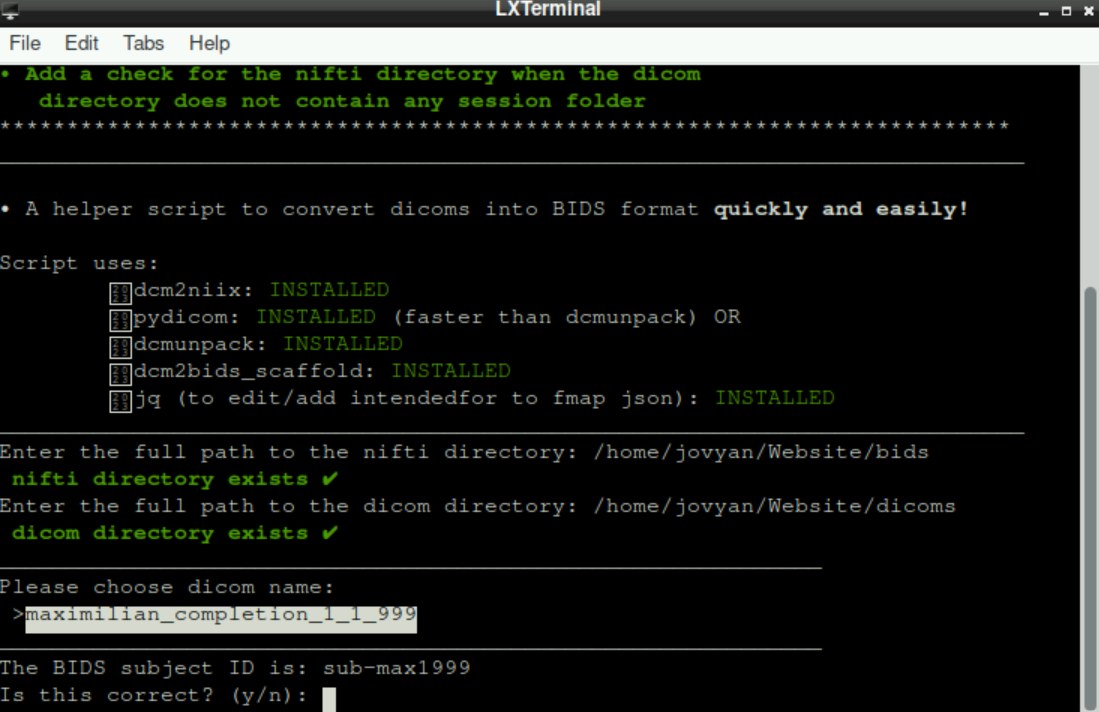
For your data to be BIDS-conform at the end, the “subject id” has to have a structure like this: sub-001, sub-002,… (All necessary information about BIDS can be found in the BIDS specification)
If the suggested name is correct, type in y and press enter.
If it is not correct, type in n, press enter and type in a/the correct subject id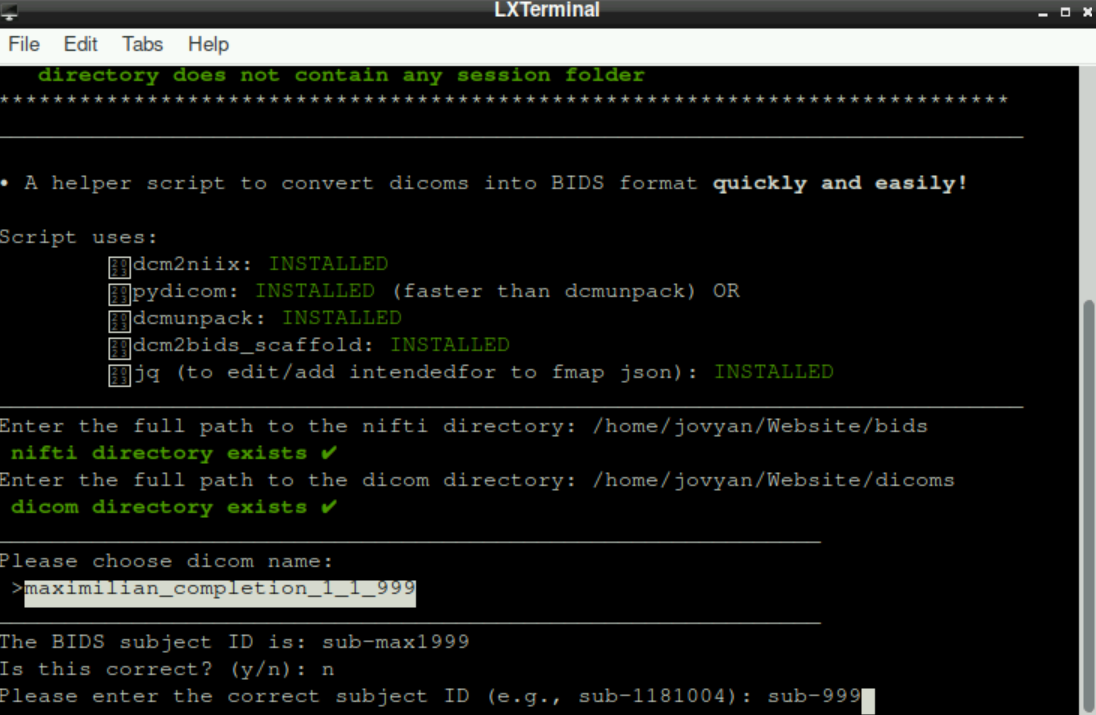 Once again, press
 enter
As a last preparation step, you are asked, if you would like to change the session folder from ses-1 to another session. If you only have one session, type n and press enter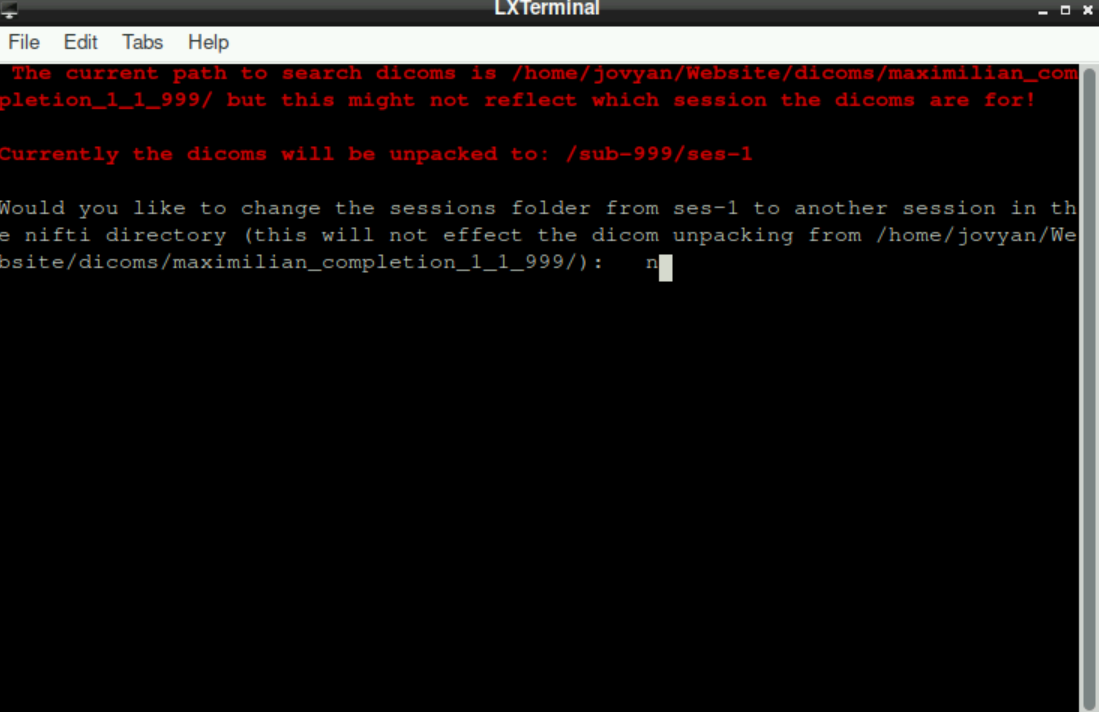
If you want to change the session, type y and provide the name of the sessions (Important: to have/get a BIDS-conform structure at the end, subdirectories for sessions have to be named ses-x with x being a number)
Subsequently, you get a short reminder in which directories your files should be stored to get a BIDS-conform structure.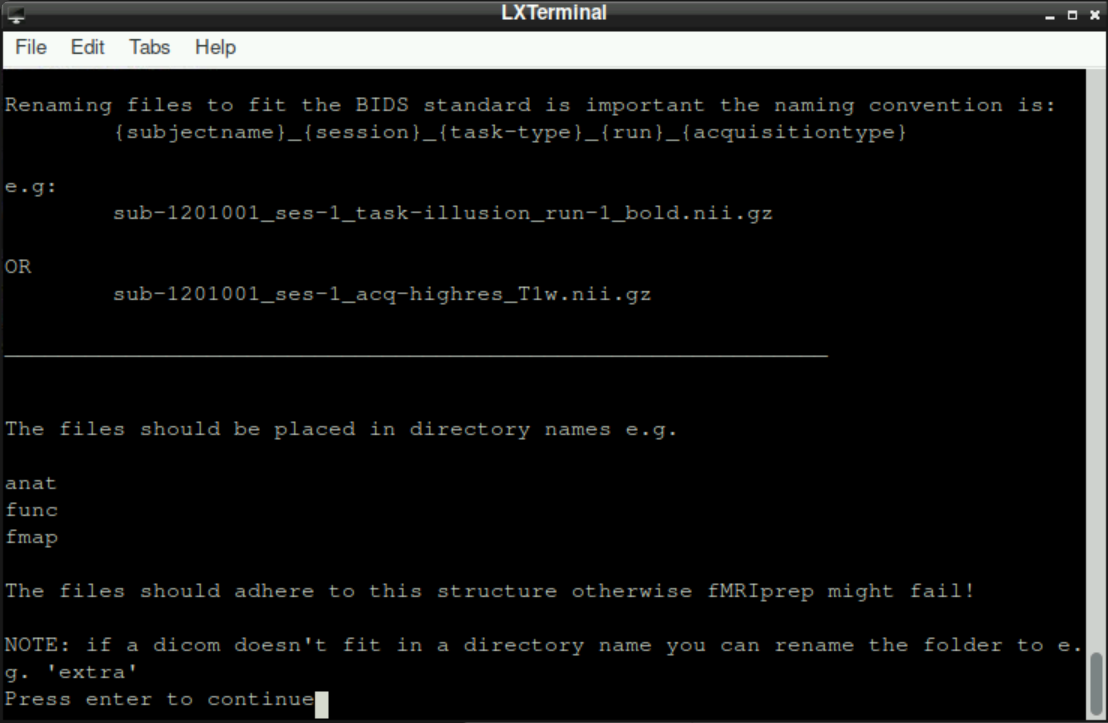
By pressing enter, the script starts to convert your dicom files to nifti’s. This can take a few seconds - be patient!
4.5 Assigning nifti’s to directories and adjusting file names
After the script converts the dicom’s to nifti’s, we have to potentially correct automatically assigned names and assign a directory. At the top of the terminal, you always see how many dicoms are left to categorize.
4.5.1 Possible Actions to perform for a dicom
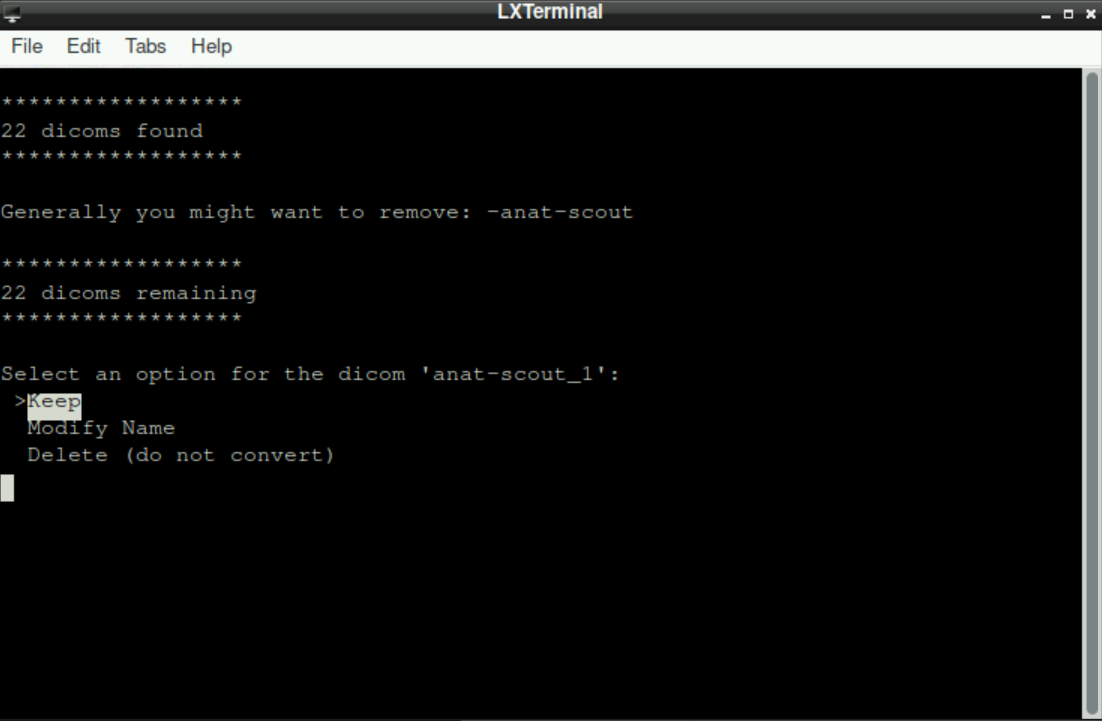
You can select one of three options for any dicom file (use up-/down arrow key to switch between the options and press enter to confirm your choice):
Keep: By selecting this option, you tell the script that the suggested name is correct and that you want to assign this file with the shown name to a directory (Since BIDS uses a specific naming convention, you´ll probably need this option only for “additional files”, like files related to denoising, that will be placed in a directory that is more or less independent of the BIDS-Format; see Section 4.5.3*)Modify Name: This option tells the script that you want to change the suggested name. This is needed, when the suggested name is not BIDS-conform. After selecting this option (by pressingenter), you are asked to edit the name. Change the name (first delete the suggested one) to a BIDS-conform filename (Hint: the initially suggested name implies what type of scan it was, so you should be able to easily determine if it was an anatomical scan, which run of a functional scan, or the fieldmap). Using a previously created file with bids-conform names can help avoiding errors and typos here, by just copy/pasting the prepared filenames! After you changed the name, pressenterto confirm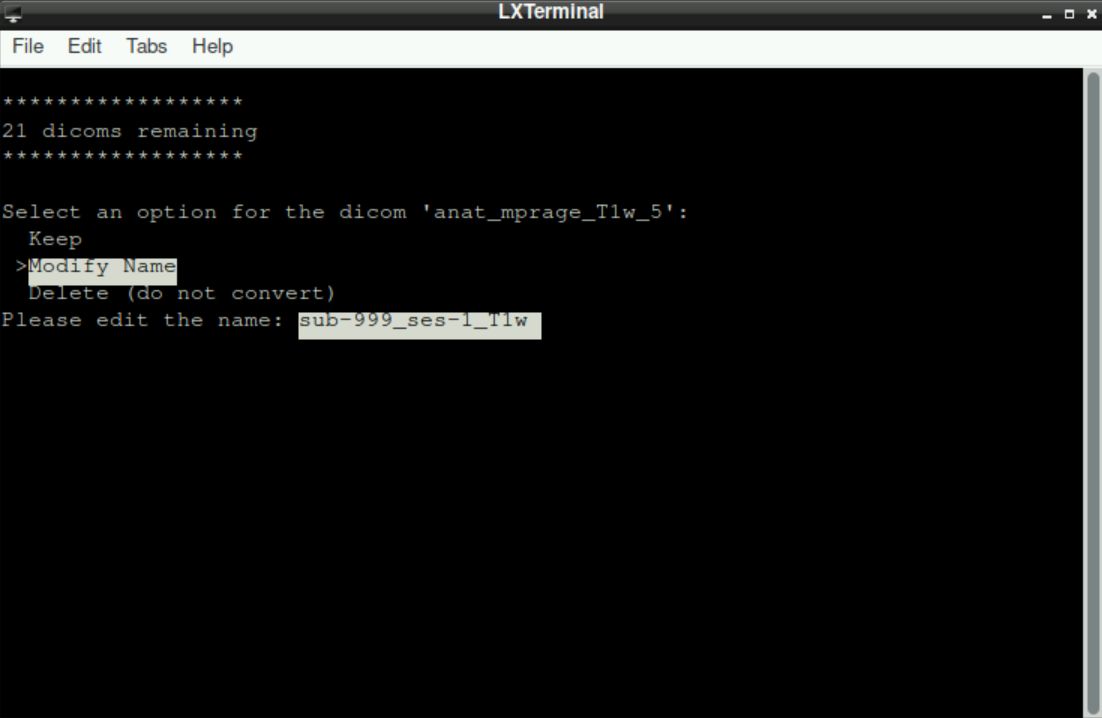
Delete (Do not convert): As the name suggests, selecting this option deletes the mentioned file (thus, there will be no corresponding nifti-file!). One case when this is generally used is for theanat-scoutscan that is irrelevant for the preprocessing and analysis, since it is a short scan at the beginning of a scanning session to ensure a proper position of the participant and to adjust the parameters for the actual scans.
4.5.2 Assigning a file to a directory
After either keeping or modifying the name, you are asked to assign the file to a directory.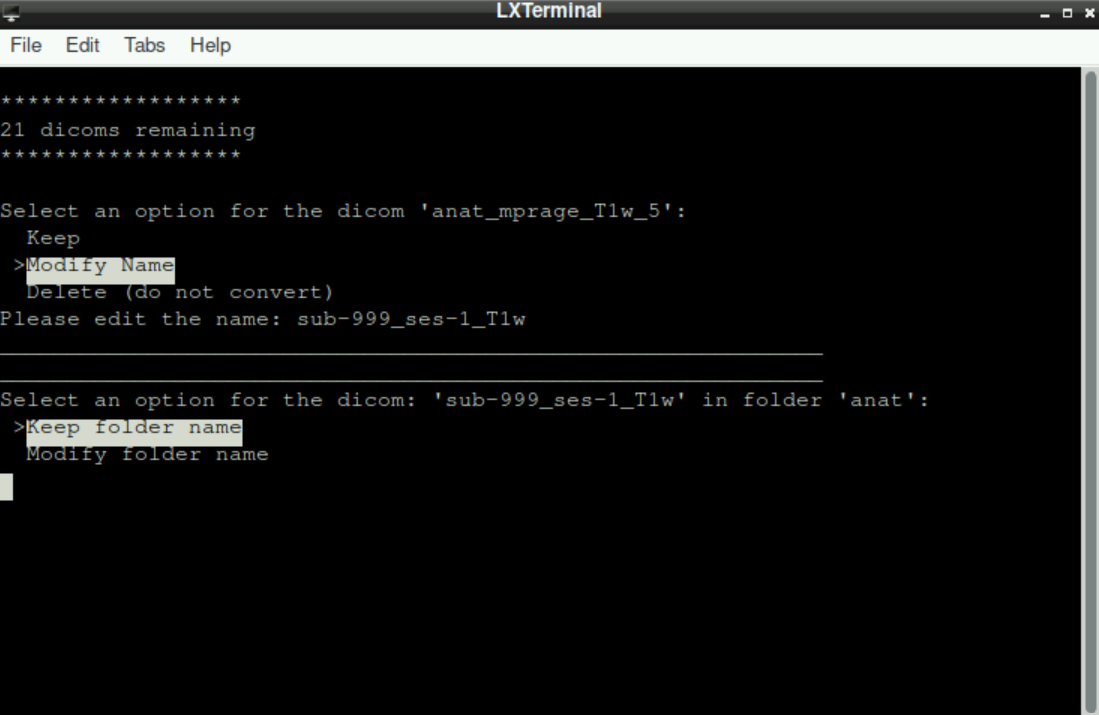
You can either:
Keep folder name: By selecting this option, you accept the suggested directory. In general, the correct directory is already suggested for most files (anatomical \(\to\)anat, functional \(\to\)func, fieldmap \(\to\)fmap)Modify folder name: This option is only needed for files that were acquired “additionally”, for example, when a denoising sequence was used (files with.phat the end, see here). As for the file name, you can edit the name of the directory after selecting this option. Entering a new/unique name for the directory here will result in an additional sub-directory in the subsequent BIDS-directory (if you enter the same name for all “additional” files, they will all be stored in this specified directory)
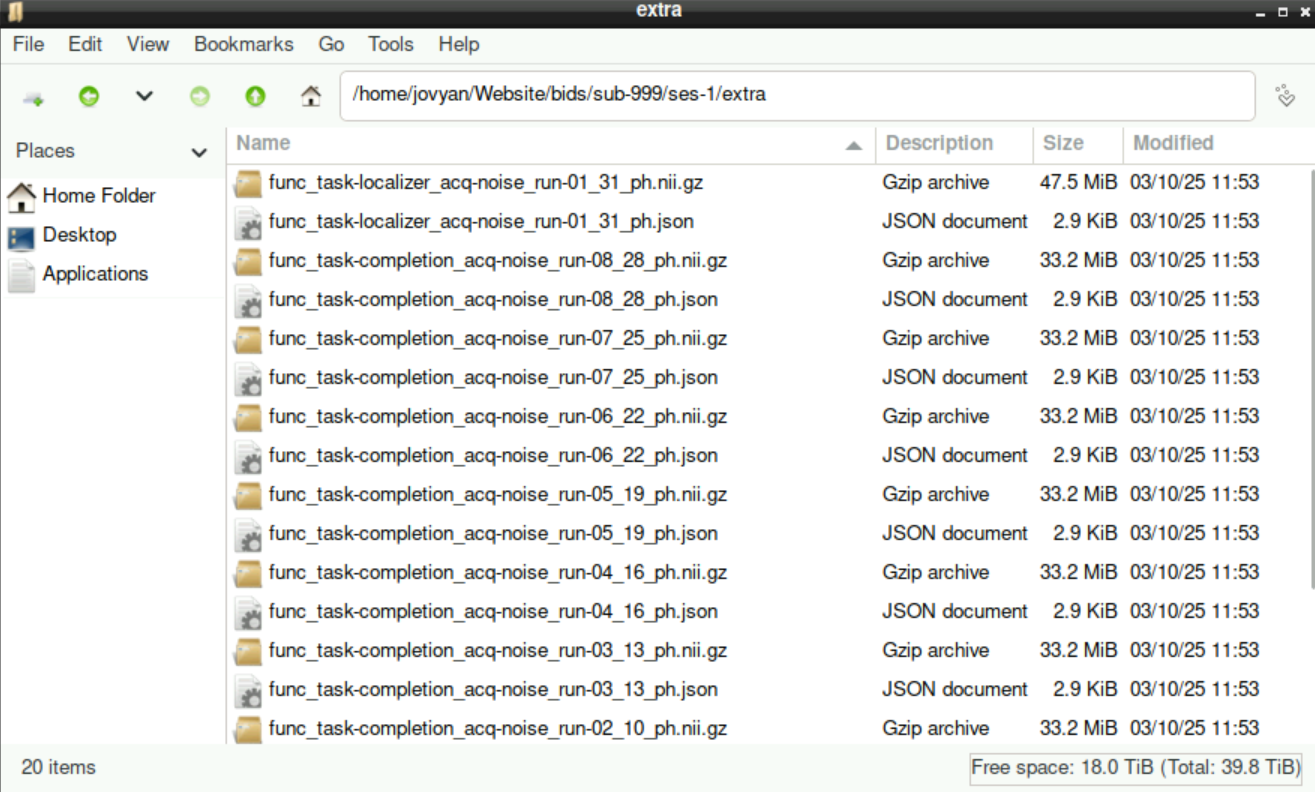
4.5.3 The “extra” directory
Sometimes we acquire files that are not part of the BIDS-Format (and, more importantly, are not used by BIDS-Apps), for example when running a denoising sequence during acquisition of the data. In the example of a denoising sequence, corresponding files are named with _ph at the end. When asked about the filename, we can just keep it as it is, since we use these files separately anyway.
Important!!
Those files have to be stored in a different directory! Thus, when asked about where to assign the file, we select Modify folder name. All “additional” files can be saved in a directory named extra (\(\to\) edit the name of the directory to extra and press enter)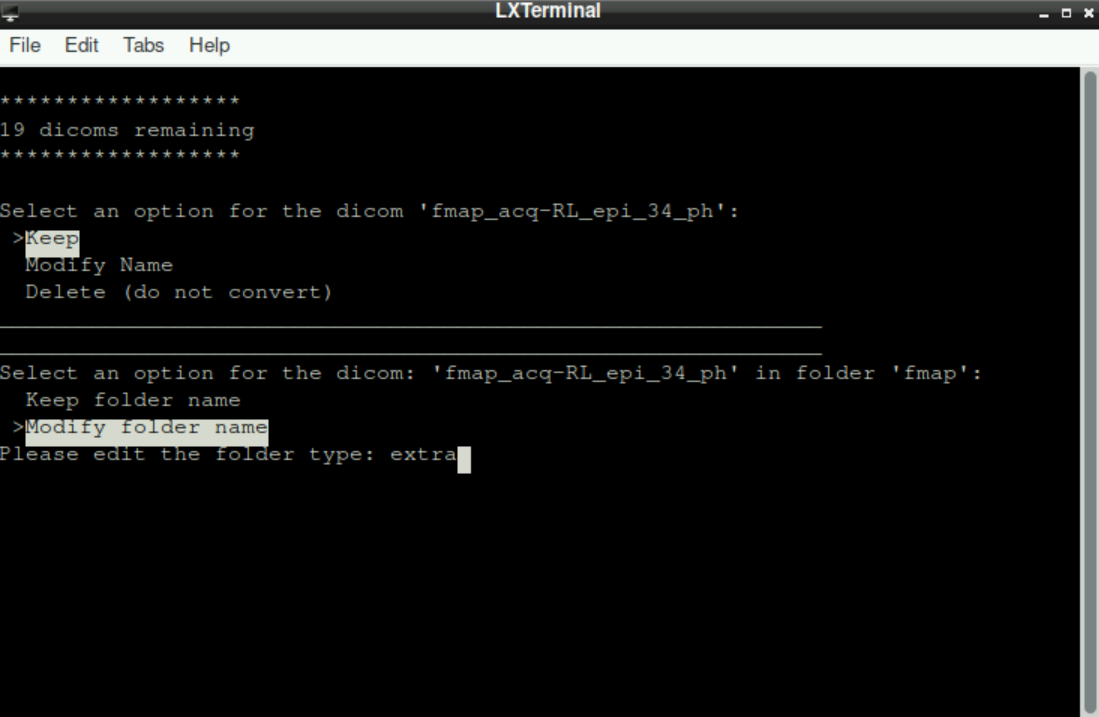
After assigning the last file to its directory, you´ll see the information, that an additional file has been created, which we will use later. The script has finished: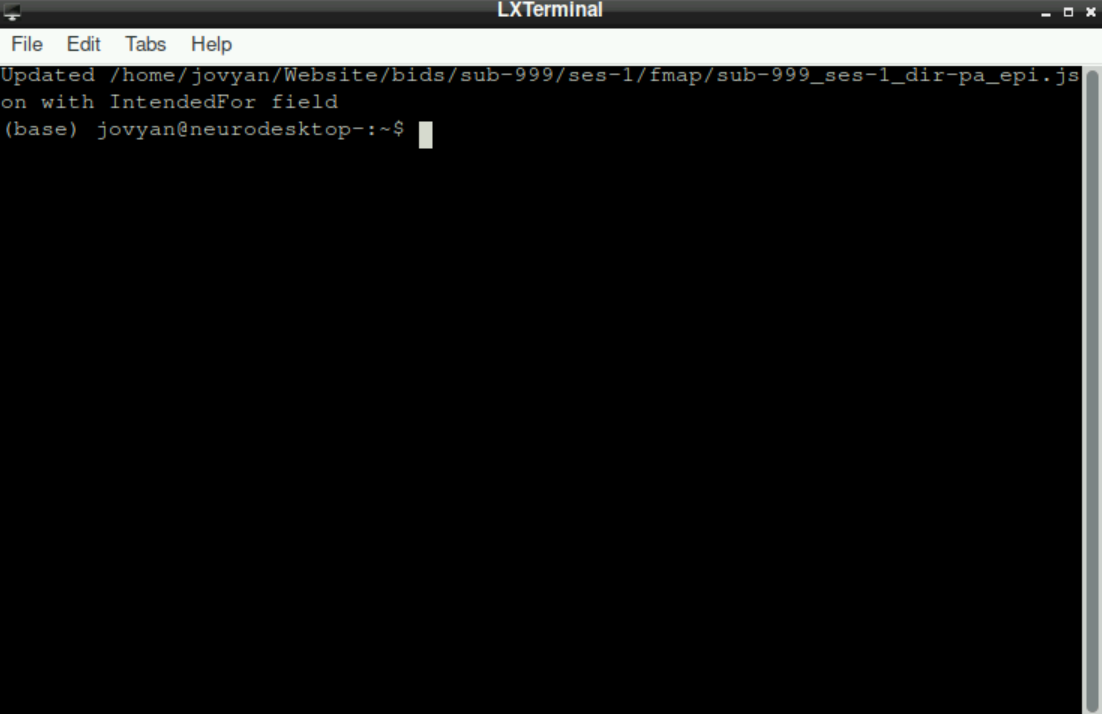
5 The resulting BIDS-directory
This is how your bids-directory (which was initially created as an empty directory) should look like: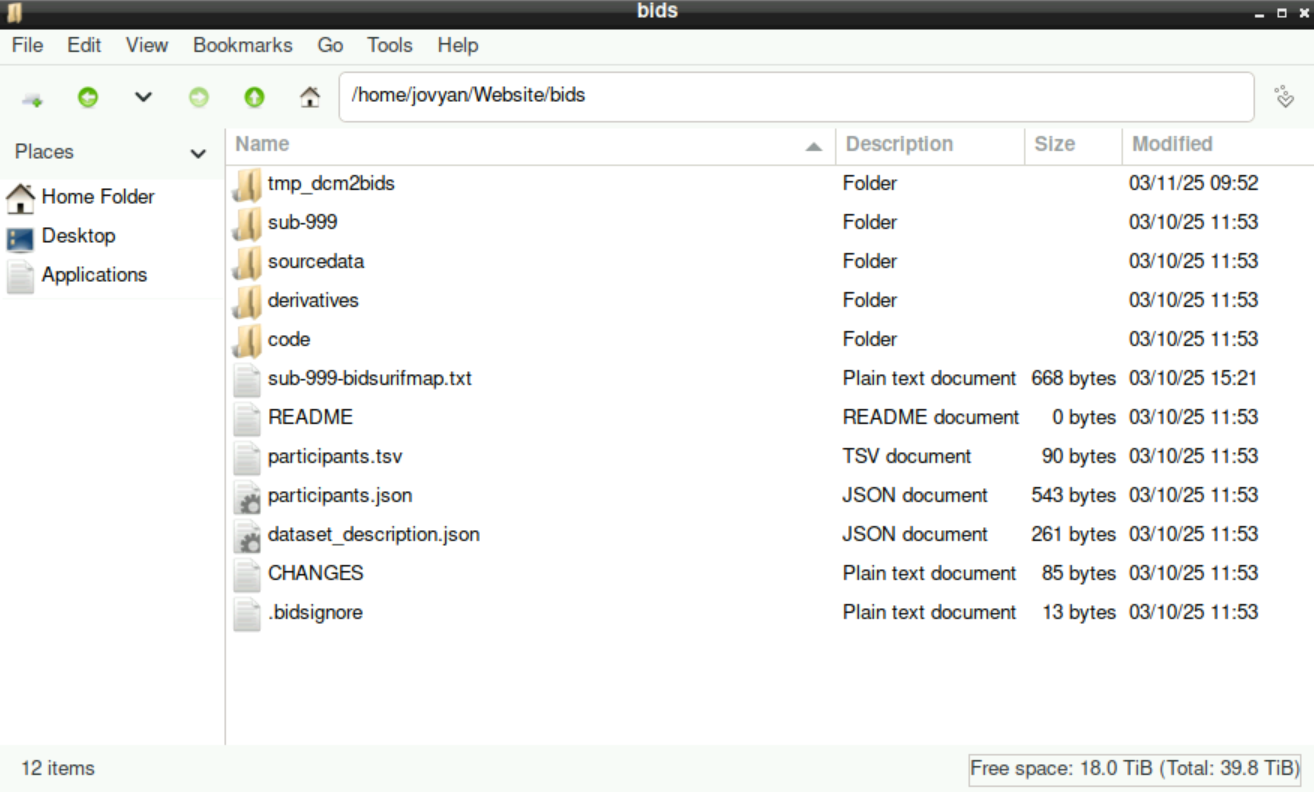
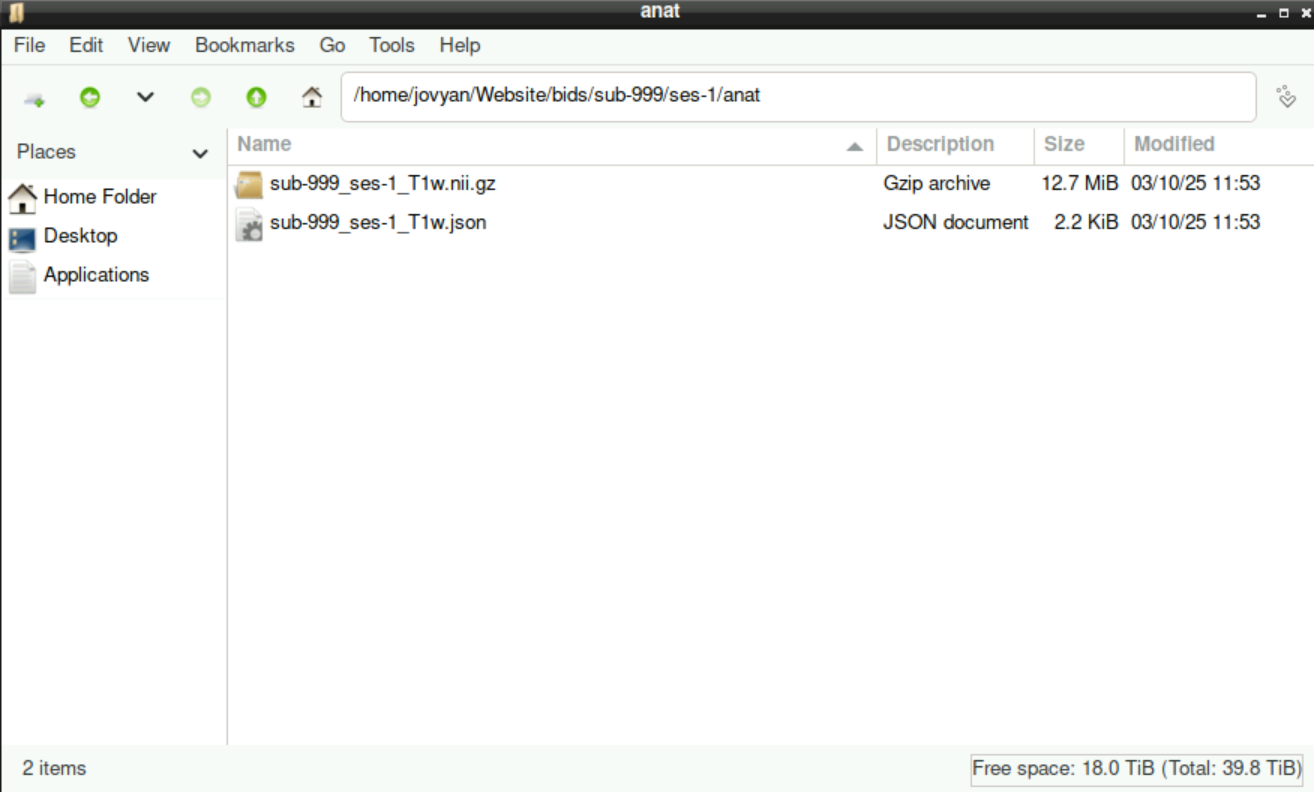
When you enter the sub-999 directory, you´ll find the sub-directory ses-1 (or whatever session you specified during the preparation). Inside, all sub-directories that you selected/edited to assign the files to are listed: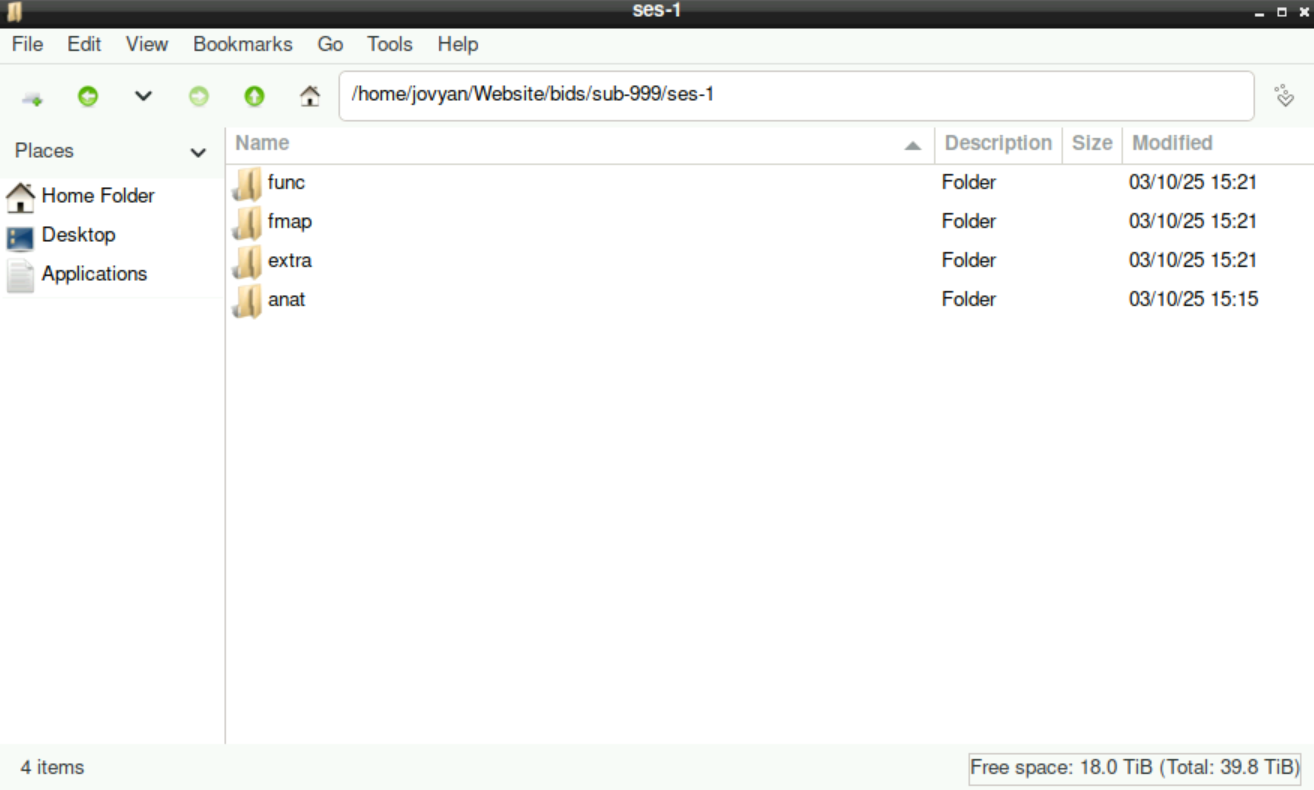
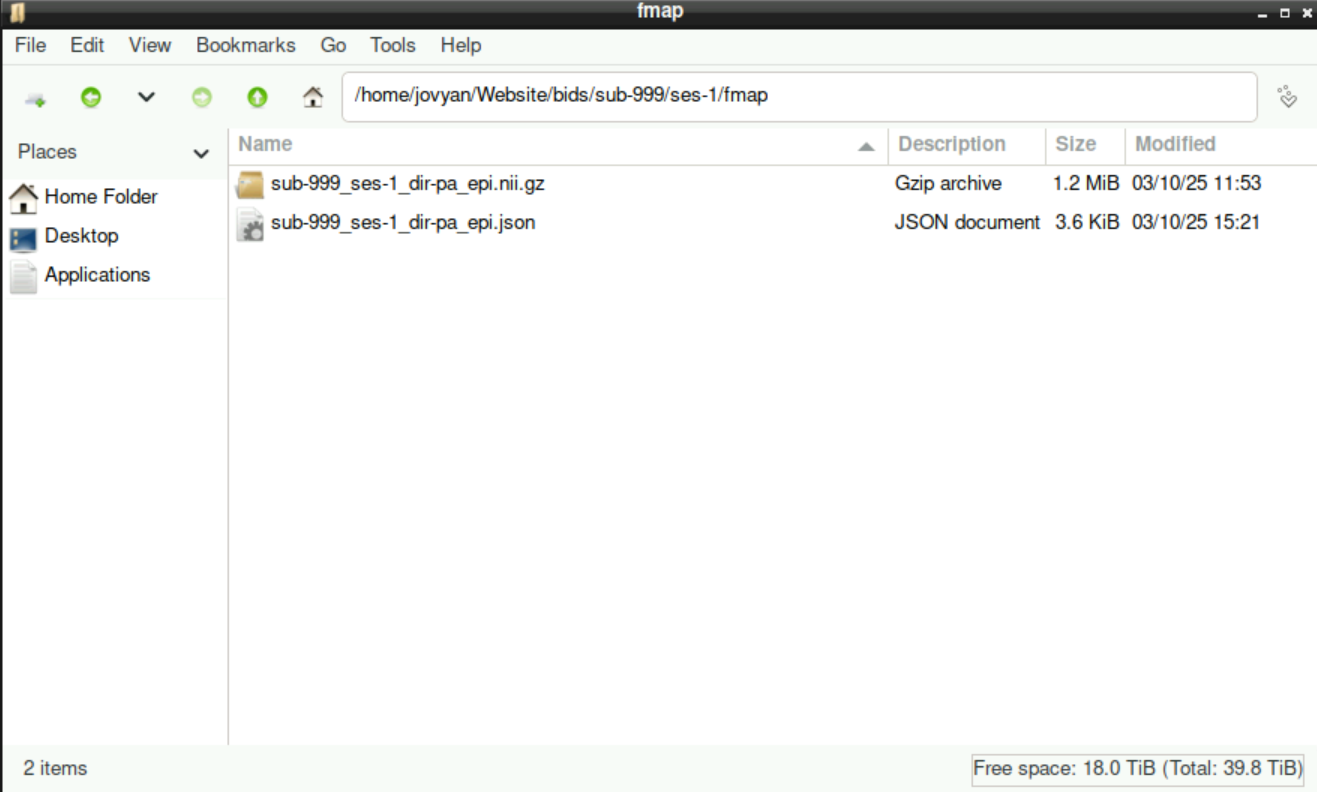
Each of these sub-directories contains all the files that you assigned, including the .nii.gz and a .json file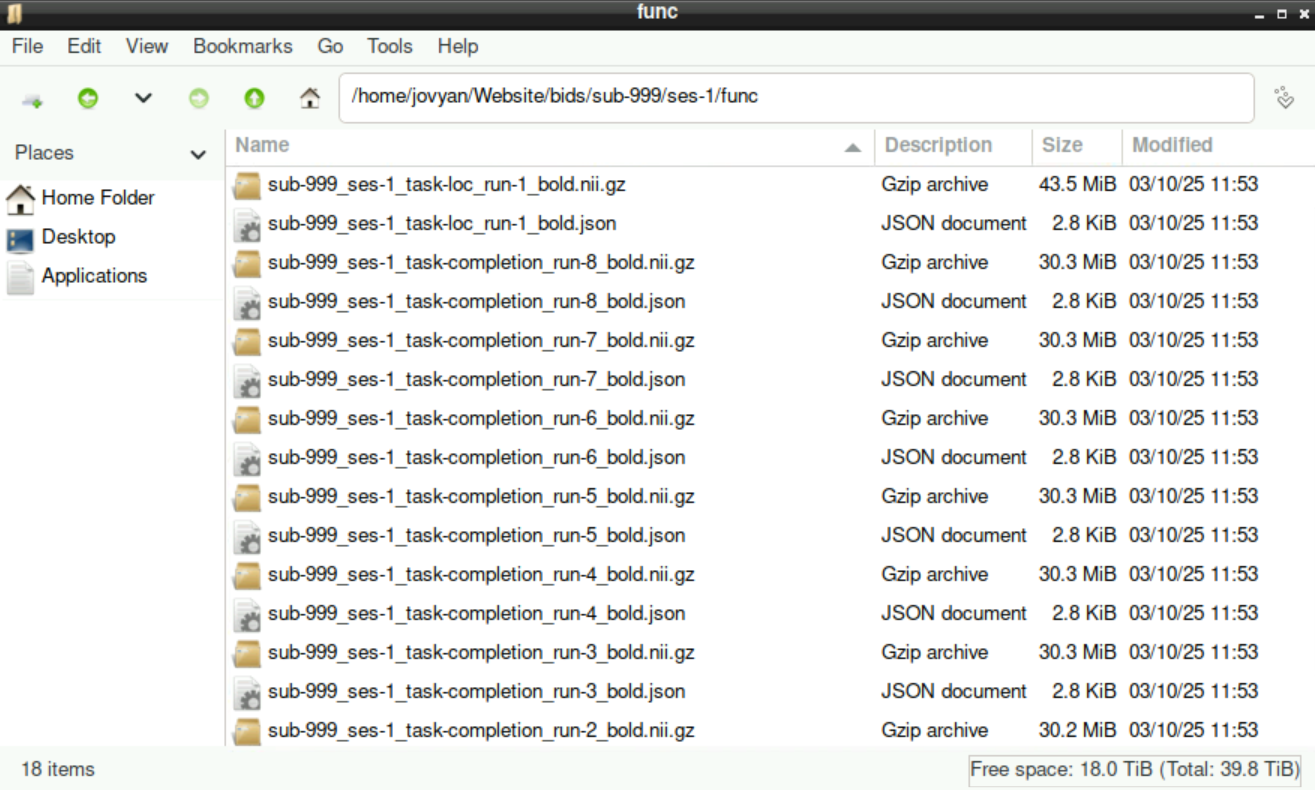
6 Congratuliations, you did it
Congratulations!
You successfully finished the process of converting your DICOM to nifti files in BIDS-Format and you are one step closer to analyzing your data!
Please return to the Overview-Page to check what to do next.
Alternatively, here is a list of potential next steps to continue with