Neurodesktop access
General information
Neurodesktop is a Linux environment specifically developed for open and reproducible neuroimaging. For details, see https://www.neurodesk.org
This page provides information and instructions on how to use neurodesktop on our lab’s server.
Access
Employees
Office computers and VPN with an employee account
Non-employees (students and interns)
Office computers
Student PC room
Resources
Each neurodesktop user is limited to 256GB RAM out of 504GB and to 20 out of 32 CPU cores.
Getting an account
Use a computer with server access (described in Access section)
Open a browser and type https://pslg-nv1.uni-graz.at
Select “sign up”
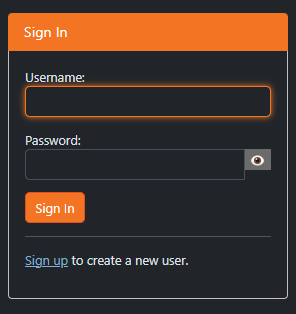
Fill out the following fields
Username: first part of your univesity email account before “@”, e.g. jane.doe if your email address is jane.doe@edu.uni-graz.at
Email: your university student or employee email address (if you are a course participant: university student email address)
Password of your choice
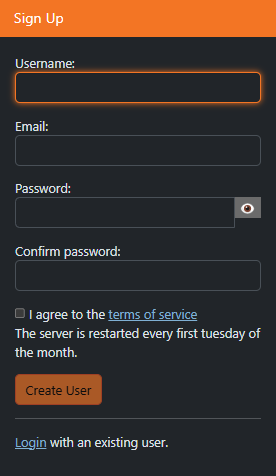
After you sign up, your account needs to be authorized by the technical staff. This may take a few days. If there is no progress, please check back with us.
Once your account is authorized, you should be able to log in with your credentials (you won’t get a any special notifications, so please just check regularly)
Using Neurodesk
Once your account has been authorized
Open a browser and type https://pslg-nv1.uni-graz.at
Sing in with your credentials
You will see a JupyterLab session. In neurodesk everyone becomes a linux user “jovyan”. Your home directory
/home/jovyanwill appear on the left handideYou can use the terminal or jupyter notebook directly in the browser by clicking the corresponding icons
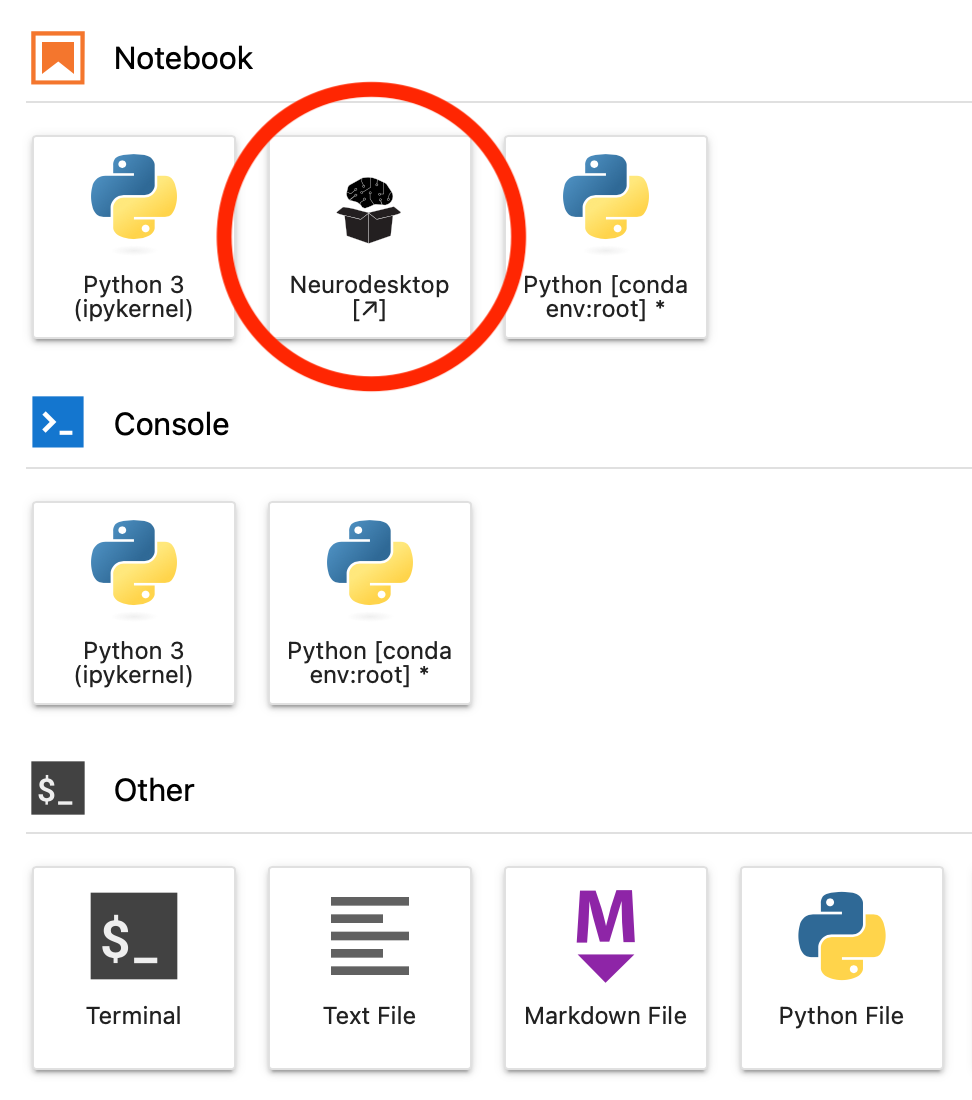
If you would like to use graphical interface, you can start the neuroDESKTOP by clicking on the icon.
You should see the desktop with all the apps:
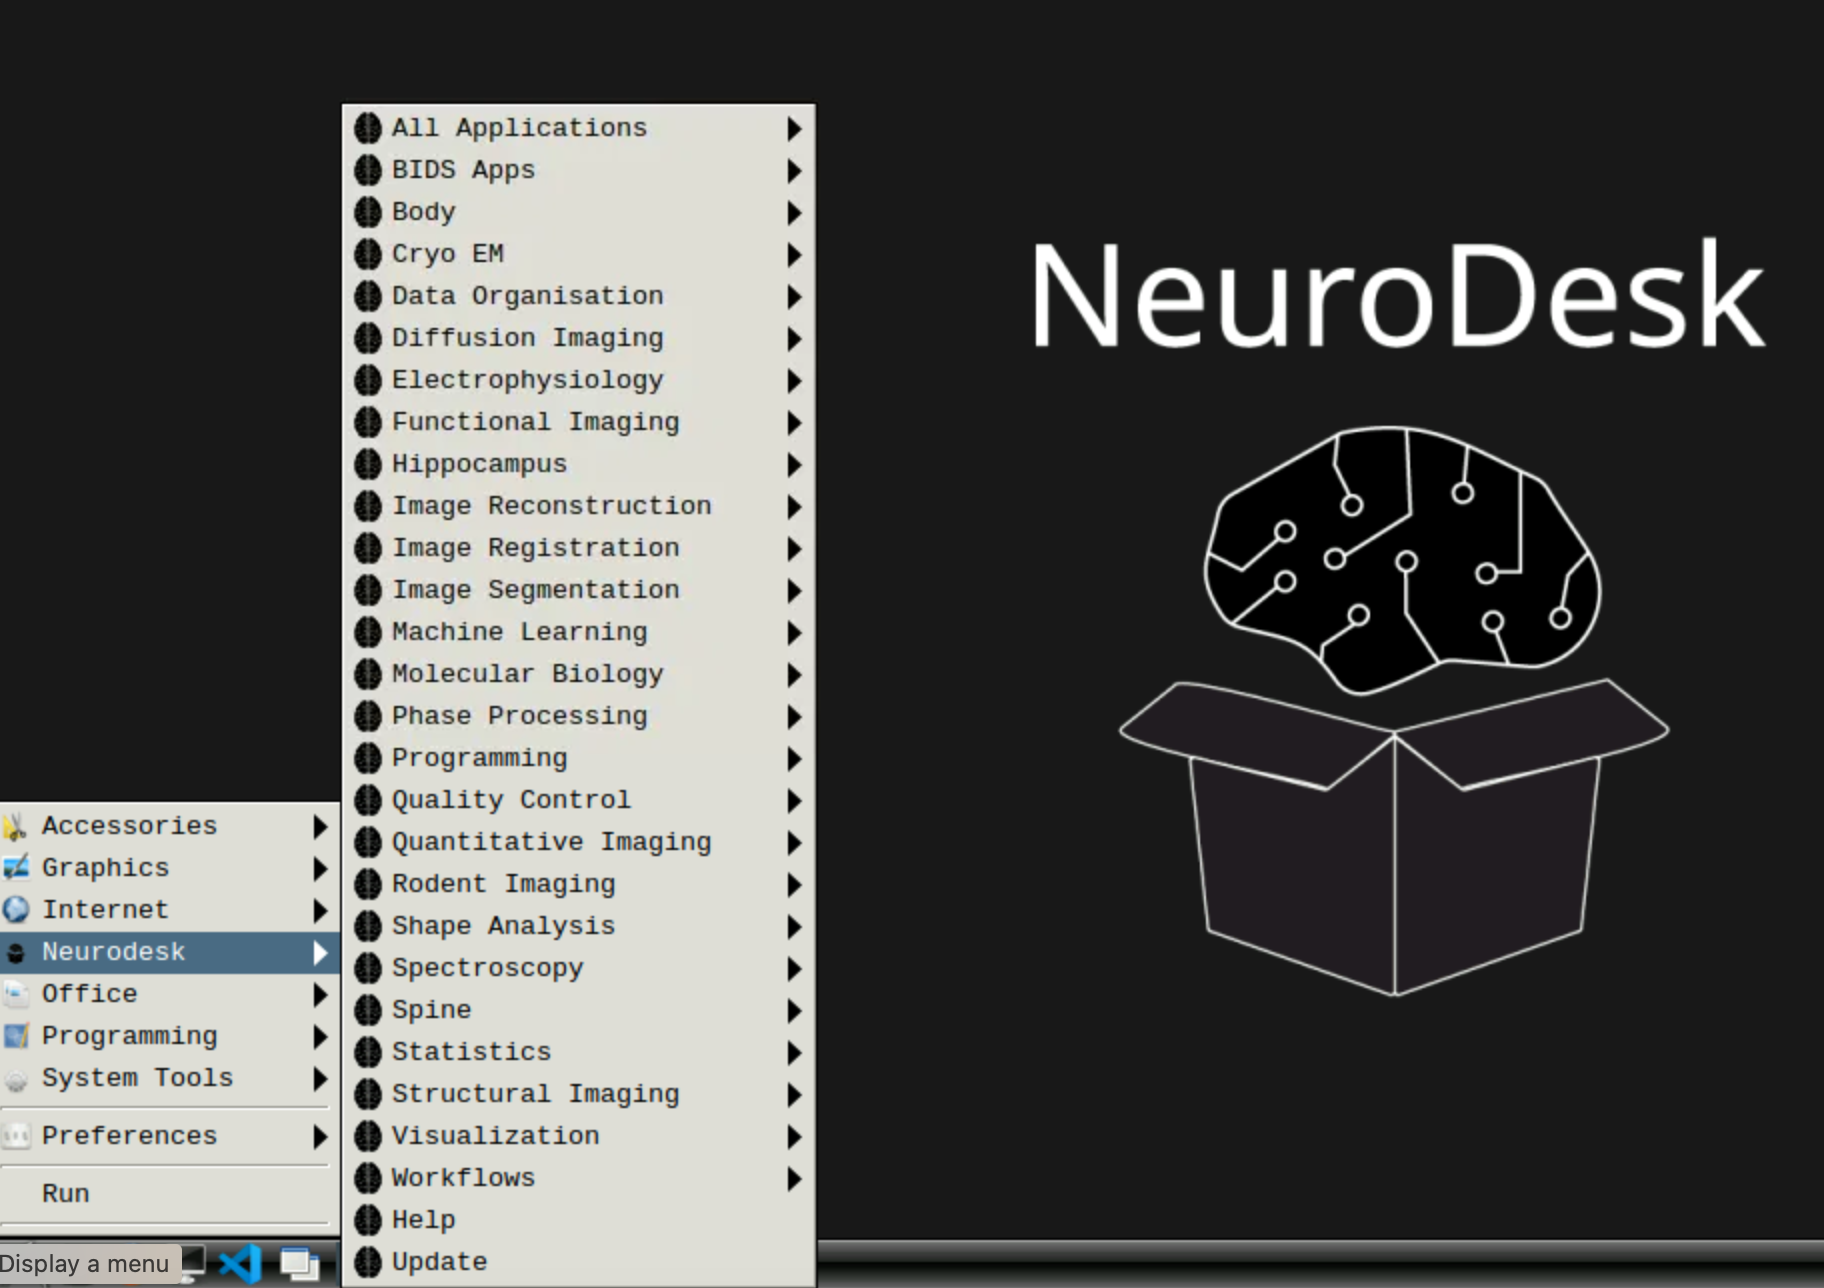
If you close this window and reopen it later, all your work will be saved as you left it (unless the server has been restarted in the meantime, which happens every Tuesday)
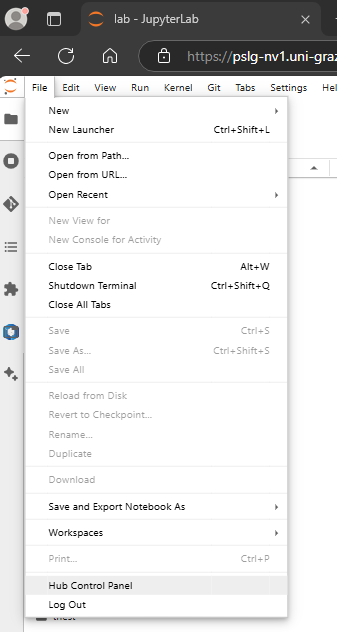
You can use https://pslg-nv1.uni-graz.at/hub/home to control your container (start/stop) or change your password. You can also reach the hub home by choosing File -> Hub Control Panel from the menue.
Note
The first time you start the neurodesk or a specific neurodesktop application, it may take a while until it opens. Be patient! This is because the first time everything gets downloaded in the background. It will be much faster when you perform the same operations repeatedly (until the next server reboot).
Storing data
If working via neurodesk, you SHOULD store data in your home directory. This data is kept after server restart and is backed up.
Sharing data
All neurodesk users have read and write permissions to
/sharedneurodesktop folder, which should be used to store things used by everyone (like atlases, software, shared data)Data transfer
There are currently two alternatives
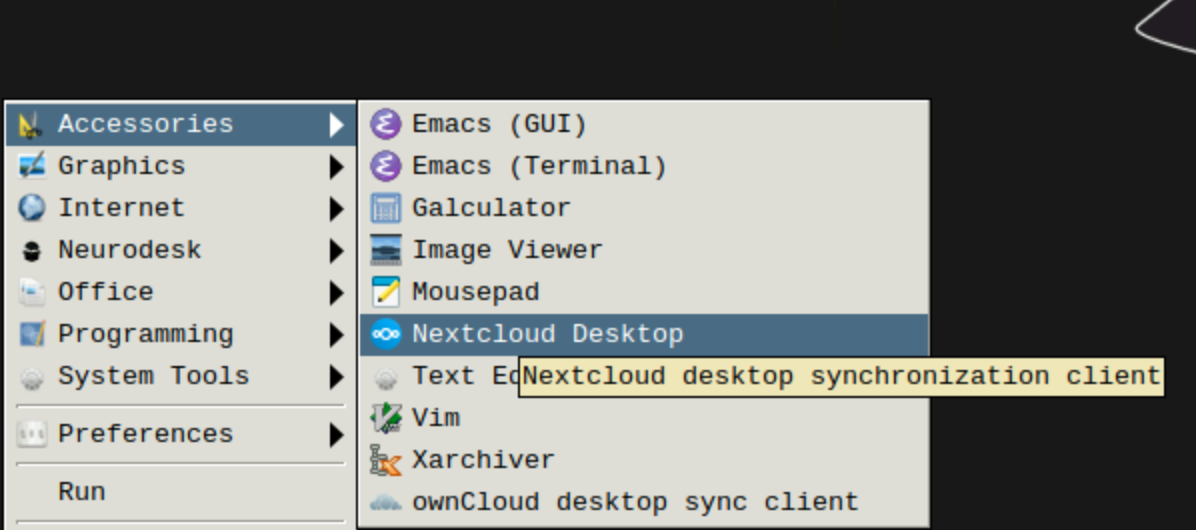
You can transfer the data via nextcloud client, which is included in neurodsktop
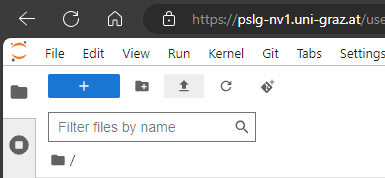
“file upload” button at the top of the jupyter lab menu (up-pointing arrow) or download by right-clicking on the relevant files. This option does not currently support multiple files, so if you want to transfer many files at once this way, it is advisable to zip them.
Using FreeSurfer
To force freesurfer/freeview to see the /storage folder, source freesurfer from the terminal as follows
ml freesurfer/7.4.1
cd /storage
freeview
To set up custom subject directory in a container, use the following (instead of export SUBJECTS_DIR=)
export SINGULARITYENV_SUBJECTS_DIR=[yourpath] export APPTAINERENV_SUBJECTS_DIR=[yourpath]Using fitlins
Using FitLins (not a part of neurodesktop basic set of tools) with Singularity:
singularity run /shared/poldracklab_fitlins_latest-2022-10-17-32670dc66bf7.simg[your fitlins commands]Please note that we are abandoning fitlins usage and are switching to nilearn for GLM analysis
Information for lab members with ssh access
Folder mappings:
(left is server right is neurodesk)
/storage -> /storage
/storage/neurodesk/shared -> /shared
/storage/neurodesk/users/{username} -> /home/jovyan
Only these three folders are persistent.
For interfacing with the folders on storage
You can create symbolic links in your home directory:
ln -s /storage/ /home/jovyan/storage